Introduction
Smart triggers are the instructions for the chatbot to perform certain actions based on the pre-defined conditions. It lets you define certain rules to have specific actions automatically. For example, you can instruct the chatbot to automatically forward the chat to a live agent by setting up the following conditions:
- When the word "live agent" or “human” occurs in a visitor's question or
- When the visitor belongs to a VIP group or any specific region.
- When the visitor is visiting the web page for the second time.
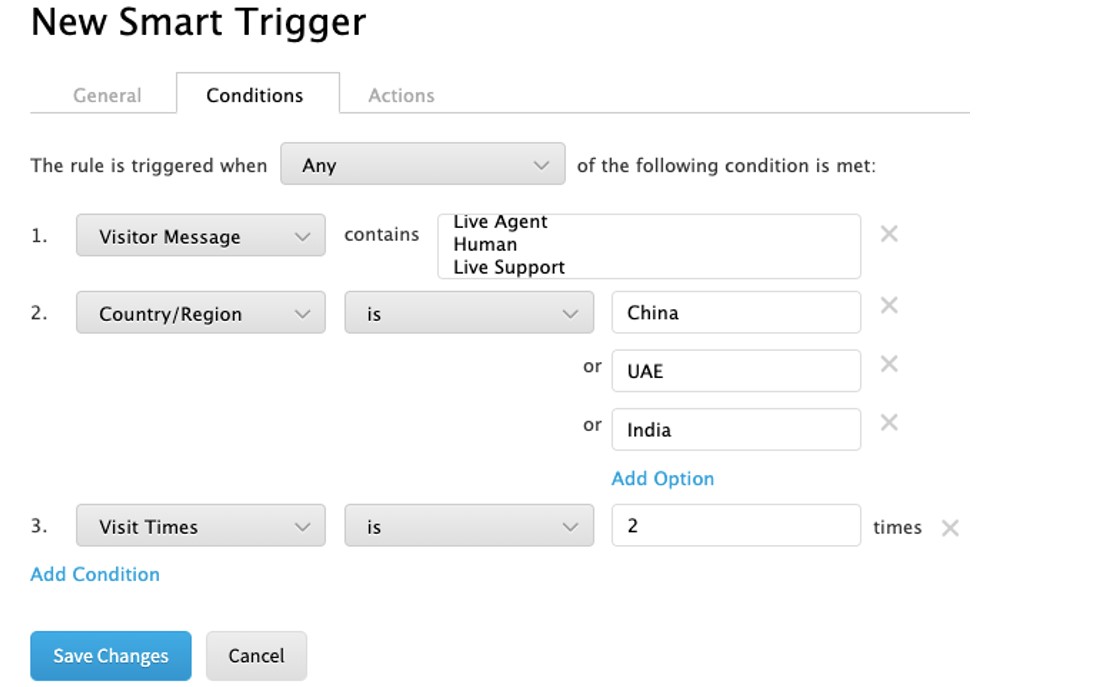
Consider a scenario, where you have defined three conditions to trigger an action. You can apply the following trigger rule using the logical operator on these conditions:
- Any: Any condition out of the three conditions is met.
- All: All three conditions are met.
- Logical Expression: Set of condition identifier associated using ‘or’ and ‘and’ operators.
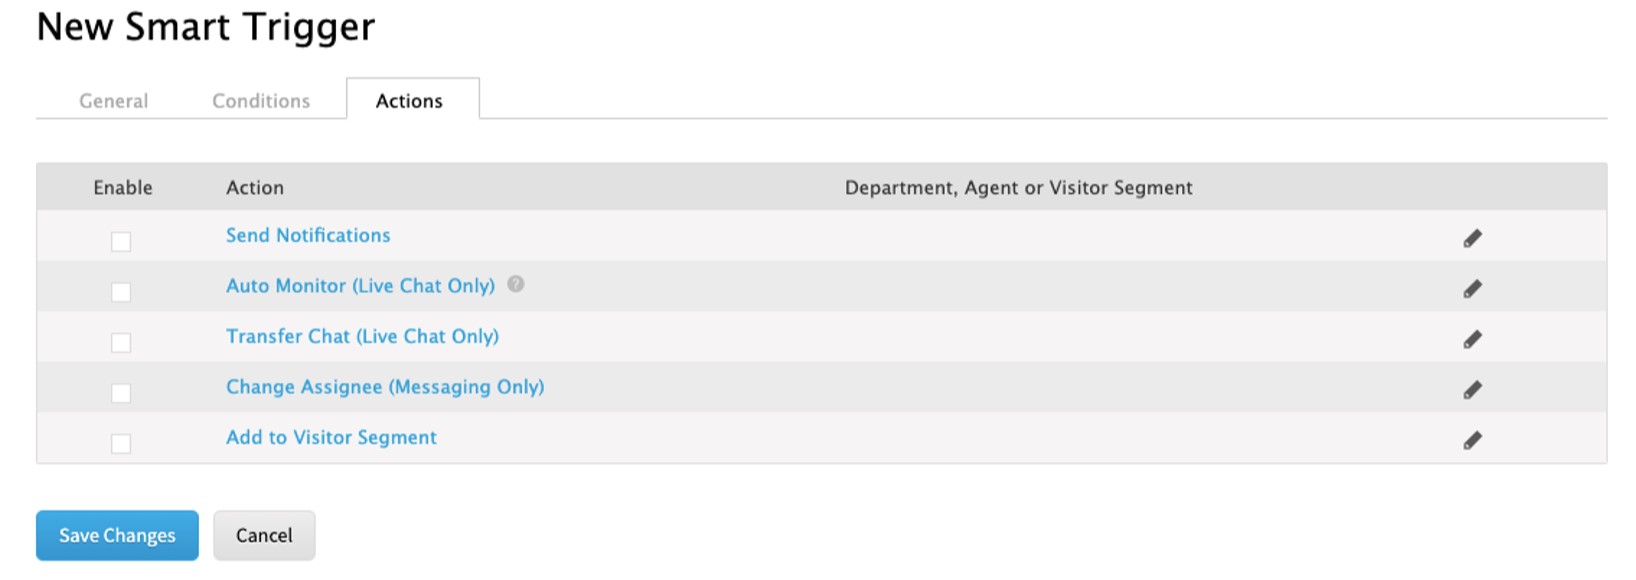
You can choose to trigger the following actions based on the set conditions:
- Send Notifications: Notifies the selected agent or department automatically.
- Auto Monitor (Live Chat Only): Enables the selected agent or department to automatically monitor the ongoing chats and intervene if needed.
- Transfer Chat (Live Chat Only): Transfers the chat to the selected agent or department automatically.
- Change Assignee (Messaging Only): Changes the ticket assignee name to the name of the selected agent or department.
- Add to Visitor Segment: Adds the visitor into the existing visitor segments (such as VIP customer segment, frequent visitor segment, and so forth) or to a new one. You are presented with a drop-down list of existing visitor segments to choose from or you can create a new visitor segment.
Note: This action is visible only if the Segmentation feature is enabled. To enable Segmentation, navigate to Live Chat > Settings > Segmentation.
Configuring Smart Triggers
To configure Smart Triggers, follow these steps:
- Log in to the Comm100 account.
- In the top navigation bar, click the Bot tab.
- From the left menu, go to AI Chatbot > Smart Triggers. The Smart Triggers page appears.
- From the Bot drop-down list, select a bot.
- Click New Smart Trigger. The New Smart Trigger page displays the General tab.
- From the General tab, do the following:
- Turn on the Enable toggle key.
- Enter the smart trigger name.
- Click the Conditions tab.
- From the Conditions tab, do the following:
- Select a logical operator from the drop-down list to set a trigger rule. To know more about the Logical Expression, see How to set Logical Expression?.
- Click Add Condition to set a condition based on your need. Each condition has its identifier.
Note:- You can add multiple conditions.
- The parentheses must come in pairs and should be written as half-width.
- Space should be added before and after OR and AND expressions. They are not case sensitive.
- The precedence of logical operators from highest to lowest is: (), AND, OR.
- The number used in the expression must exist in the identifier list.
- Click the Actions tab.
- From the Actions tab, do the following:
- Select the checkbox of the actions you want to trigger. An action pop-up appears.
- Select the Departments or Agents option.
- In case you select Departments:
- Select the department from the list of departments.
- In case you select Agents:
- Filter Agents by the department from the All Agents drop-down list or select Agents.
- Select an agent from the Agent list.
- In case you select Departments:
- Click OK.
- Click Save Changes.
A new smart trigger is listed on the Smart Triggers page. - From the list area of smart triggers, you can perform the following actions on smart triggers:
- Disable or enable
- Edit
- Copy
- Delete