Comm100 Live Chat Salesforce Integration helps send live chat data to Salesforce CRM for follow up and allows you to identify existing Salesforce contacts/leads right on your chat console. Download the PDF file or continue reading this article to quickly set the integration up.
Download PDF version
Connect Comm100 Live Chat with Salesforce CRM
- Log into your Comm100 account.
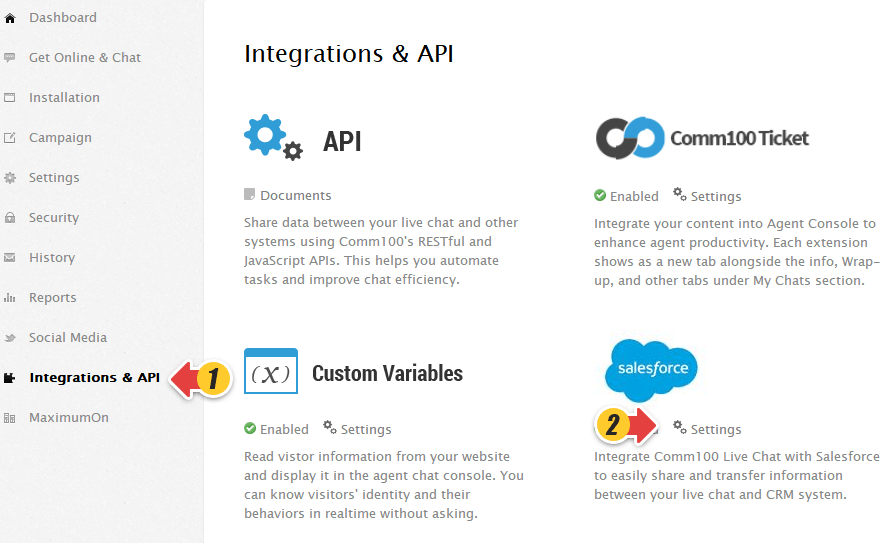
- Click Integrations & API at the left menu.
- Click Settings under Salesforce.
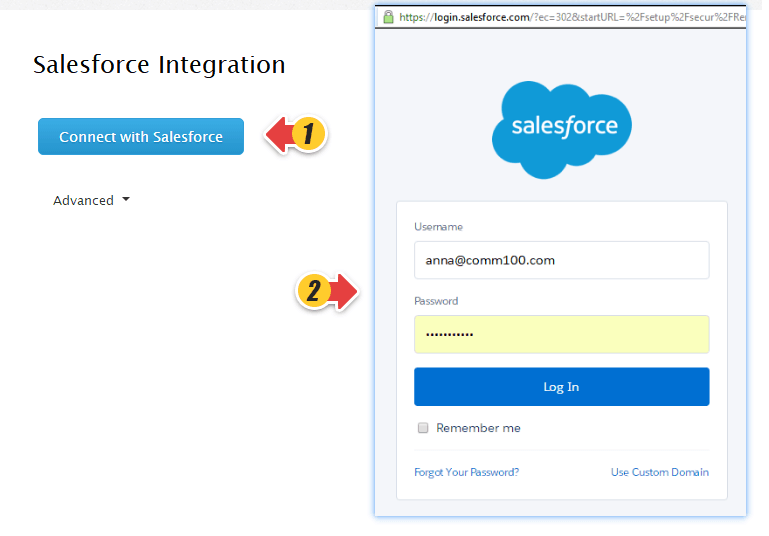
- Click Connect with Salesforce and then provide your Salesforce login credentials in the popup window.
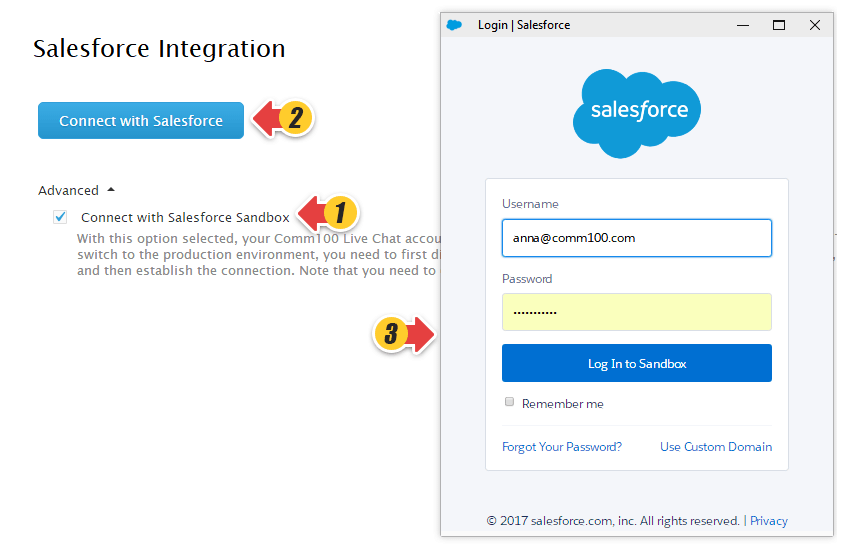
If you want to connect Comm100 Live Chat account with your Salesforce Sandbox environment before moving to the production environment. You can click on Advanced option to Connect with Salesforce Sandbox.
Note: You need to have particular sets of permissions in your Salesforce account for the integration to work. It is recommended that you use an Admin SF account.
Verify all the required Salesforce permissions
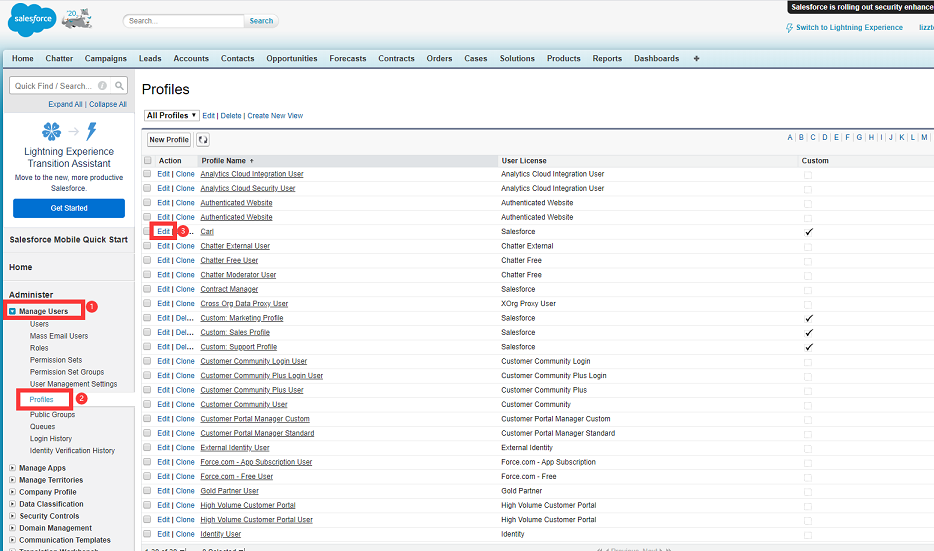
- Switch to Classic View Mode.
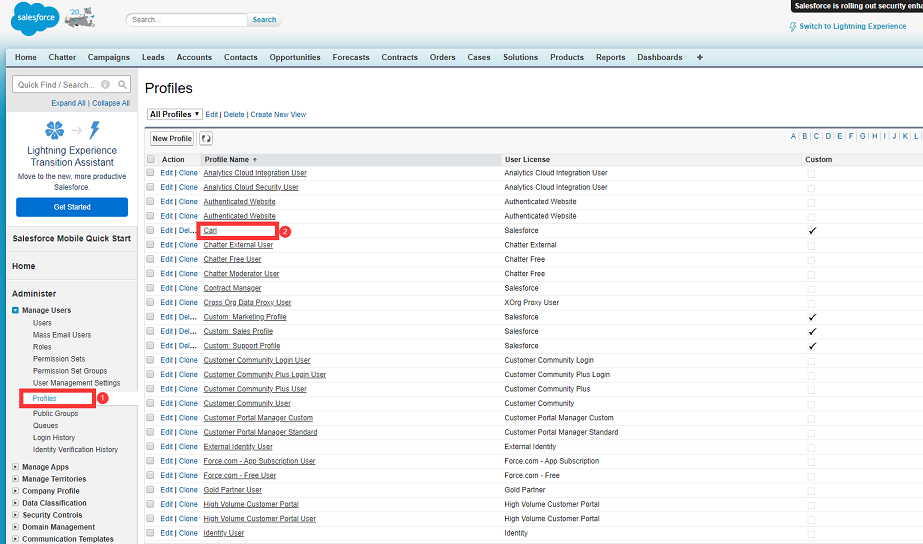
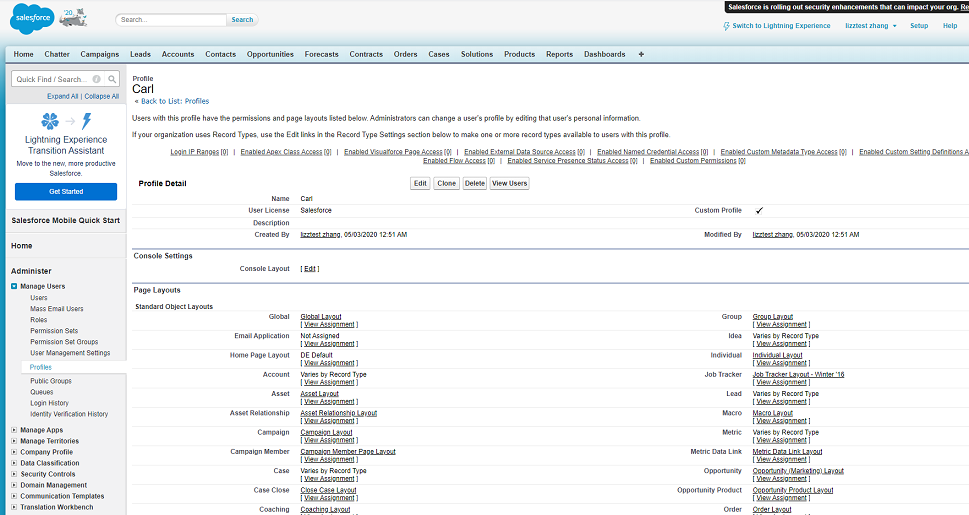
- Navigate to Manage Users > Profiles, locate the profile you want to edit and click Edit.
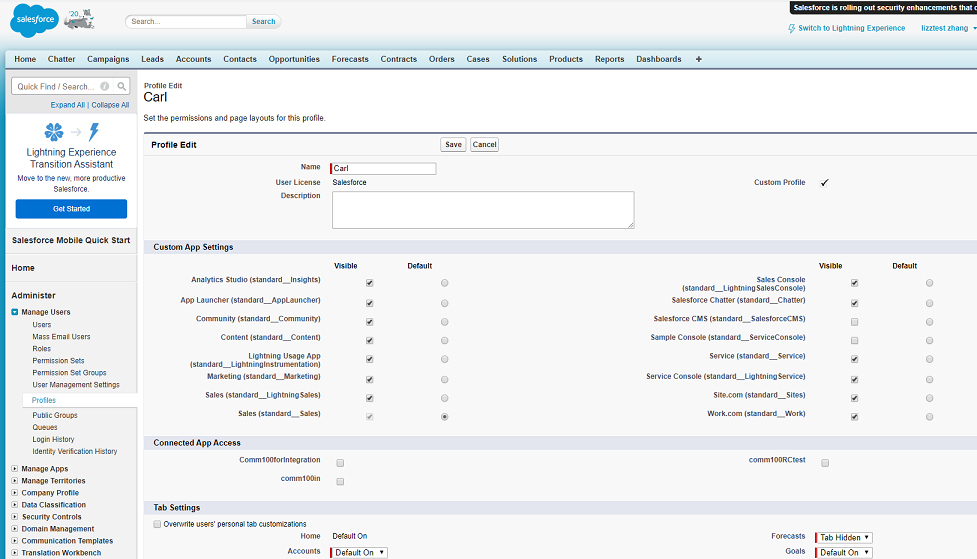
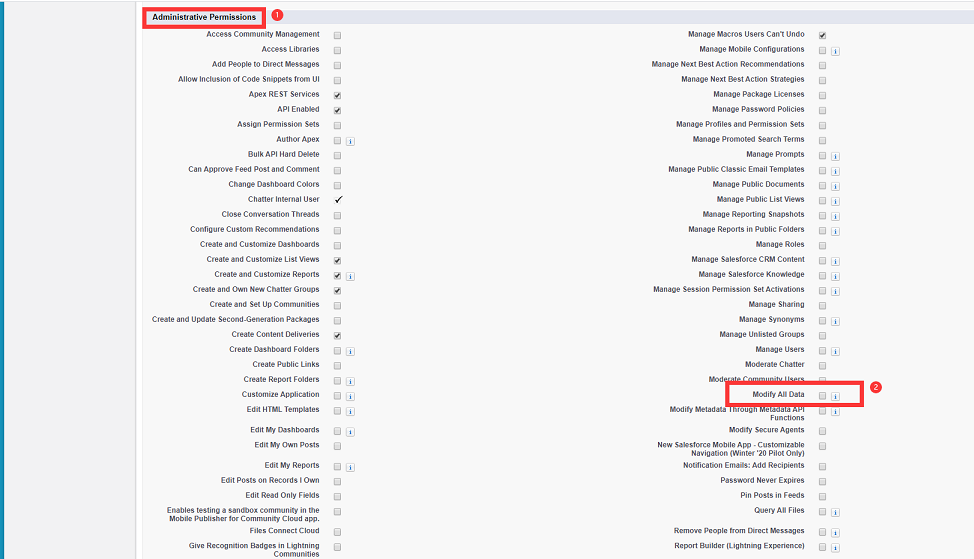
This is what Profile Edit page looks like. - Under Administrative Permissions section, make sure the option Modify All Data is checked.
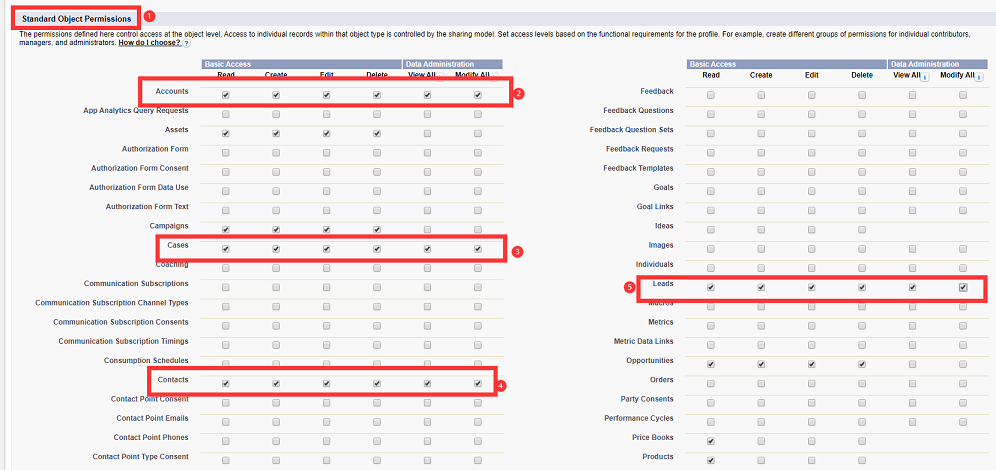
- Under Standard Object Permissions section, make sure the permissions Read/Create/Edit/Delete/View All/Modify All are checked for Accounts/Contacts/Cases/Leads.
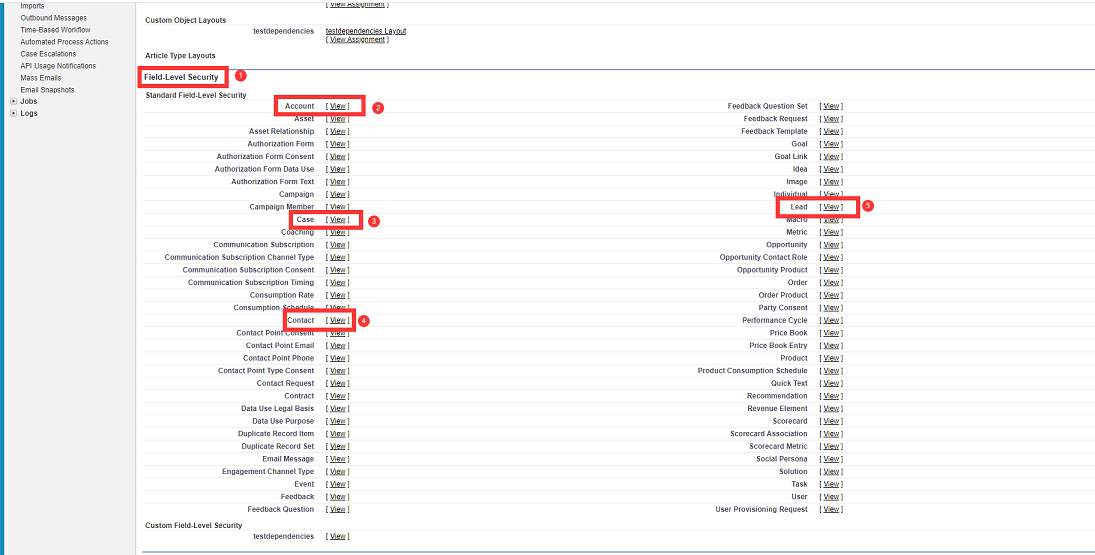
- Navigate back to Manage Users > Profiles, locate the profile again and click on the Profile Name.
This is what Profile General page looks like. - Under Field-Level Security section, make sure the permissions Read Access/Edit Access are all checked under Accounts/Contacts/Cases/Leads Views.
Note: Some permissions Read Access/Edit Access cannot be checked due to restrictions from Salesforce.
This is what Account View looks like.

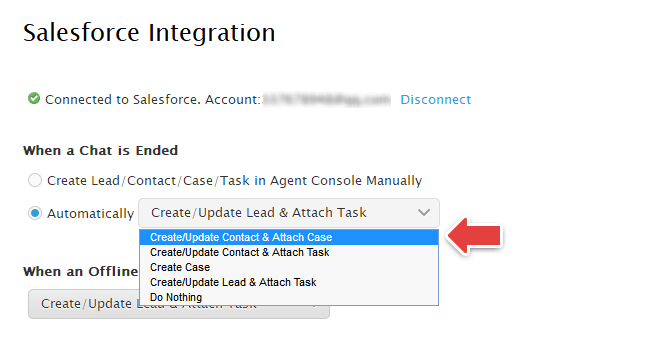
Choose How to Record Live Chat Data in Salesforce CRM Automatically
After connecting Comm100 Live Chat with your Salesforce CRM, you need to choose whether you want us to record live chat data as Lead details, Contact details or simply create as Case in your Salesforce account.
For Sales: Record Visitors as Leads and Chats/Messages as Tasks
A lead will be created for each visitor who cannot be found from the existing leads in Salesforce account and a task is created for each chat/message of the visitor.
Create a Lead
If a visitor is not found by email from the existing leads in your Salesforce account, a new lead will be created for the visitor when a chat ends or an offline message is submitted.
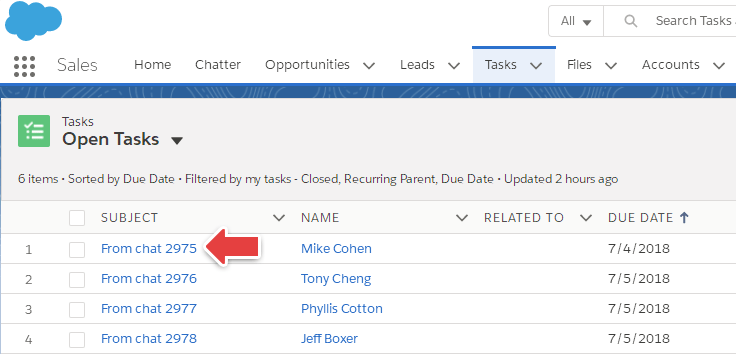
Create a Task
When creating a new lead, the chat/message of the lead is attached as a task under the lead. For an existing lead, each chat/message from the lead will be added as a task.
For Support: Record Visitors as Contacts and Chats/Messages as Cases
A contact will be created for each visitor who cannot be found from the existing contacts in your Salesforce account and a case is created for each chat/message of the visitor.
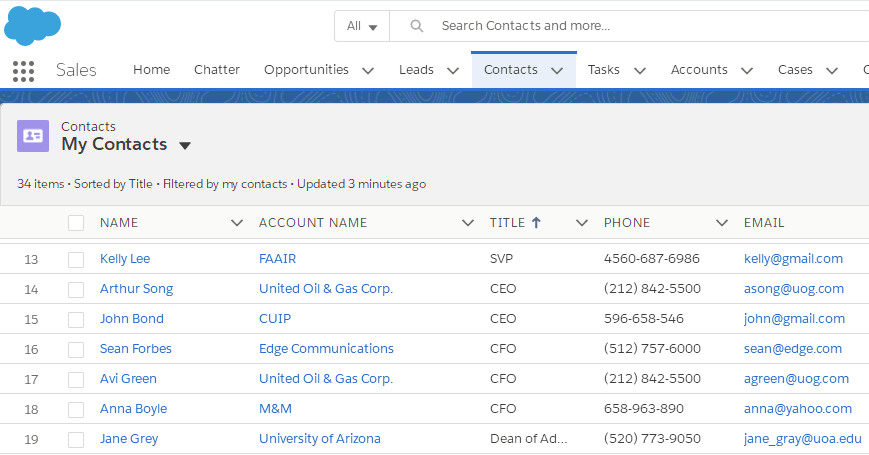
Create a Contact
If a visitor cannot be found by email from the existing contacts in your Salesforce account, a new contact will be created for the visitor when a chat ends or an offline message is submitted.
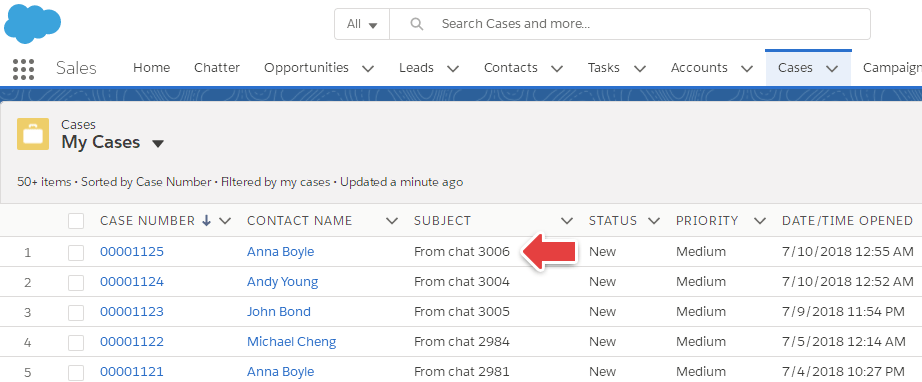
Create a Case
When creating a new contact, the chat/message of the contact is attached as a task under the lead. For an existing contact, each chat/message from the contact is attached as a case.
Update Contact Information
If a visitor can be found from the existing contacts in your Salesforce account, options are available to decide whether the contact information will be overwritten:
- Do not update the contact information.
- Update the contact with information from live chat.
- Only add new information (Do not overwrite existing information).
Manually Create Lead/Contact/Case/Task
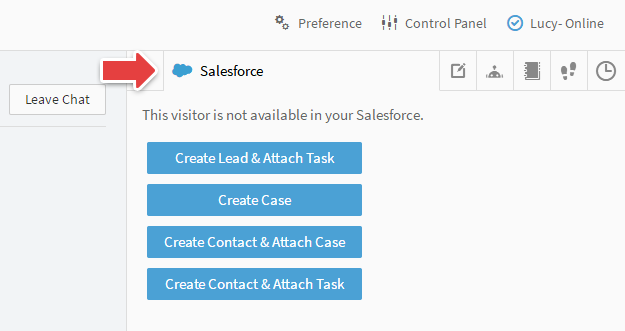
If you don’t want to automatically create Lead/Contact/Case/Task, you are also allowed to create them manually in your Comm100 Agent Console. Manually click on the action you want to perform and the corresponding data will be recorded in your Salesforce account.
Live Chat Data You Can Get in Salesforce
Contact/Lead Details
|
Comm100 Live Chat Fields |
Salesforce Contact Fields |
Salesforce Lead Fields |
|
Agent who chatted with the contact/lead |
Contact Owner |
Lead Owner |
|
Name |
Last Name |
Last Name |
|
|
|
|
|
Phone |
Phone |
Phone |
|
Company |
Company in Case Details |
Company |
Case/Task Details
|
Comm100 Live Chat Fields |
Salesforce Case Fields |
Salesforce Task Fields |
|
Agent who chatted with the contact/lead |
Case Owner |
Task Owner |
|
Name |
Contact Name |
Name |
|
|
Contact Email |
|
|
Phone |
Contact Phone |
Phone |
|
Chat ID |
Subject |
Subject |
|
Chat Content |
Description |
Comments |
|
Note |
Description |
Comments |
|
Start Time |
Description |
Comments |
|
End Time |
Description |
Comments |
|
Custom Fields and Custom Variables |
Description |
Comments |
|
Request page |
Description |
Comments |
|
Attachments |
Attachment section in Case Details |
Attachment section in Comments Details |
Who Will Be the Contact/Lead/Case/Task Owner
While creating a new contact, Comm100 will set your existing Salesforce user who has the same email address as the chatting agent as the Contact Owner. If no such user is found, the user whose account is used to connect Comm100 Live Chat with Salesforce will be set as the owner. The same rule is applied to Lead Owner, Case Owner and Task Owner.