Comm100‘s Bot is an automated virtual agent that is designed to answer your customer’s questions. It acts like your human live chat agents, helping your customers get answers to their questions and accomplish their goals.
Video description here.
Comm100’s Bot is an add-on feature with an additional cost. Please contact our sales team to find out more about pricing.
This tutorial, as structured below, is designed to walk you through steps to begin using Comm100’s Bot.
- Creating a New Bot
- Manage Chatbot Intents and Entities
- Bot Entities
- Quick Replies
- Smart Triggers
- Bot Learning
- Basic Bot Settings
- Enable Comm100 Bot for your Campaign
After your sales agent or account manager has activated Bot, you can create your very first Comm100 Bot. Here is how you get started:
Creating a New Bot
After your sales agent or account manager has activated Bot, you can create your very first Comm100 Bot. Here is how you get started:
1. Log in your to Comm100 account.
2. Go to Bot module, then Bots, and then click New Bot.
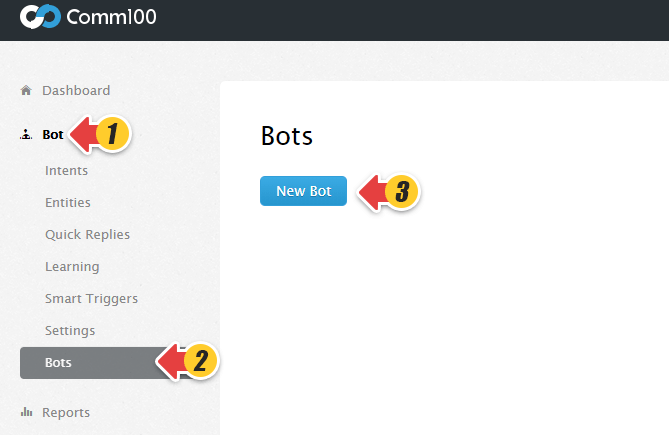
3. A Pop-up window appears. Give your bot a Name and select the Language you want the bot to speak in.
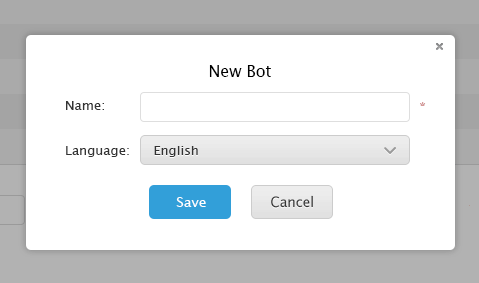
4. Click the Save Button.
5. A new Bot has been created.
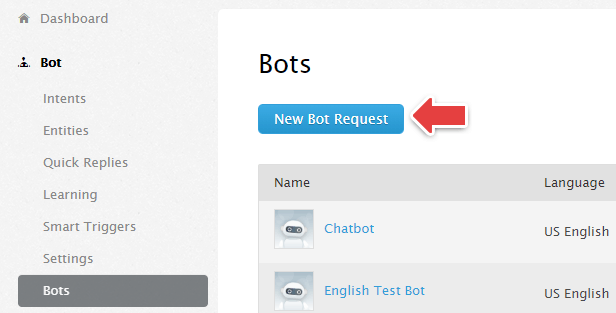
Note: You can create up to 3 Bots by default. If you want to create more Bots, please send a request by filling out the New Bot Request form.
Managing Bot Intents and Entities
Create New Intents
Intents are the purposes or goals that a user wants the Bot to understand, such as booking a flight, paying a bill, or finding a news article. Start creating your intents, your Bot will be able to understand your visitor’s questions and help with the goal they are trying to achieve.

A good place to start when creating you initial Bot question bank is by inputting your most frequently asked questions and their answers. To create a new intent in this repository, follow these steps:
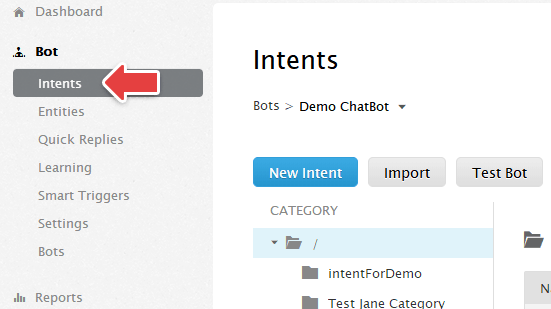
1. Click on New Intent.
2. Enter a question which might be asked by your visitor as Intent name.
3. Select a Category for the questions.
4. Click on New Question to add Questions.
You can define multiple questions based on your Intent. A certain number of the questions coverage will help your Bot better understand a visitors’ purpose.
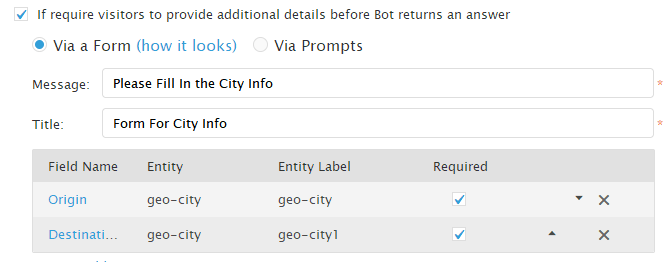
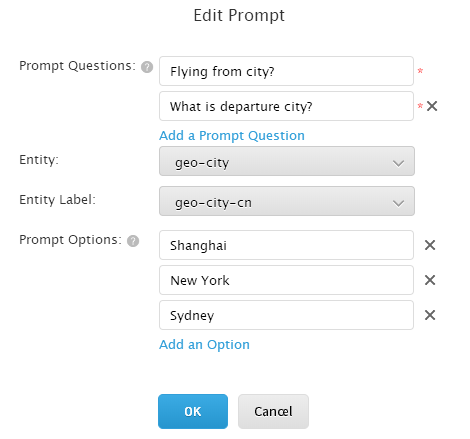
The option require visitors to provide additional details before Bot returns an answer allows the Bot to collect more information before providing an answer. You need to label the Entities in questions before you can collect data from visitors.
- Via a Form: The Bot will send a form to visitors so they can provide the information needed to return a response.
- Via Prompts: choosing this option allows the Bot to gather needed information in a question and answer format. Visitors will be presented with predefined options as potential answers for each prompt. For each prompt, you can add up to 10 options.
- Require visitors to share their location allows your Bot to ask fora visitors’ geographic location and return answers which are location specific.
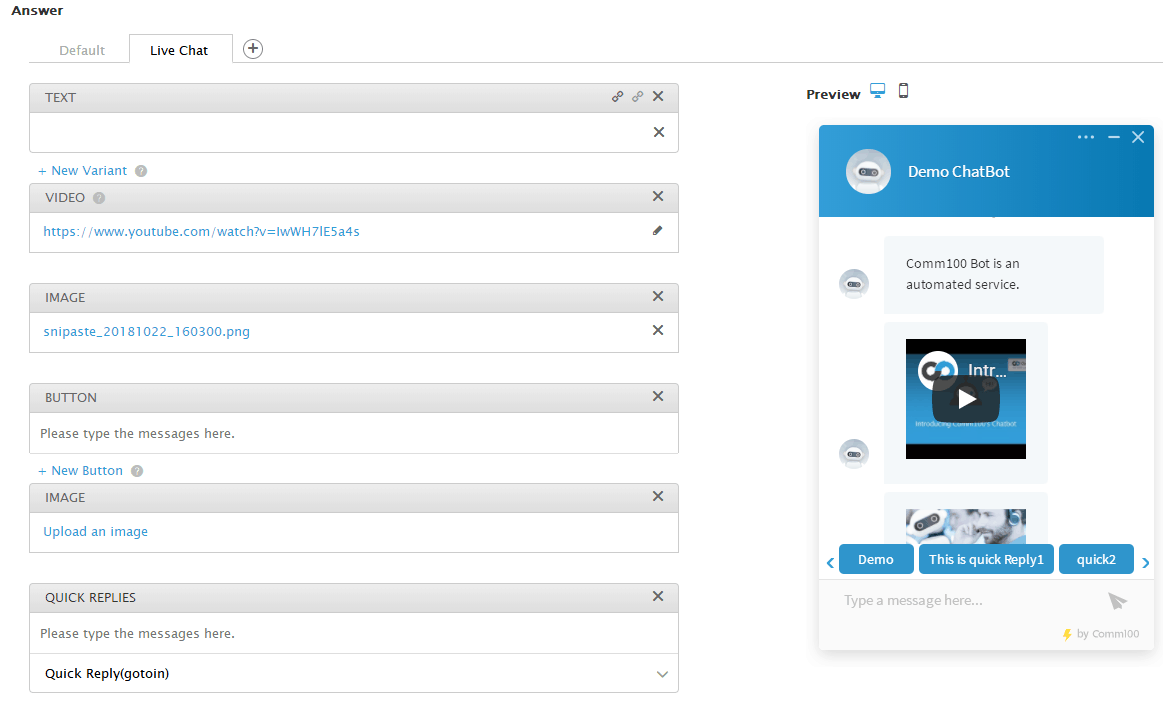
5. Set up the Answer to the questions.
There are different modes for Answers. By Default, you can select Text, Buttons, and Quick Reply as answers.
You can also include images and videos in the response. If you choose Live Chat, you can select from additional answer types
including Images, Videos, and data retrieved from your web application using Webbooks.
6. Click on the Options button to extend more options: You can also choose to require visitors to sign in before
Bot responds to the intent.
Note: For Visitor Single Sign-On (SSO), the Message and Sign-in Link under this option are on the Bot level.
Changing them in one intent will affect all others. The Sign-in page will open in a Side Window.
7. Save changes.
Bot Entities
A Bot Entity contains detailed information that is relevant to a visitor’s purpose and helps you extract a data type from the
visitor’s questions. The data can be a name, product name, date or any group of words.
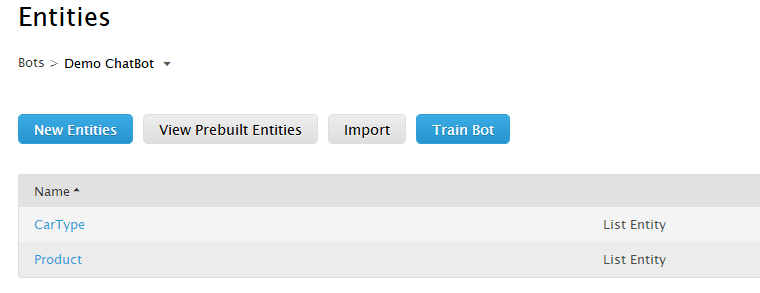
Comm100 provides some common Prebuilt Entities such as temperature, ordinal, email, and phone number. You can also Import your own
Entities. On the Import Entities page, you can download and check a sample file before importing Entities.
Importing Intents and Entities
If you have a large number of ready-made Intents and Entities, you can easily get started by importing them into your Comm100 Bot
Please check the supported formats and detailed requirements for importing Intents and Entities.
Quick Replies
Quick replies are displayed in the chat window as clickable buttons with pre-defined answers. When clicked, the button will
provide a quick response or connect the visitor to an online agent.
To create a Quick Reply, please follow the steps below:
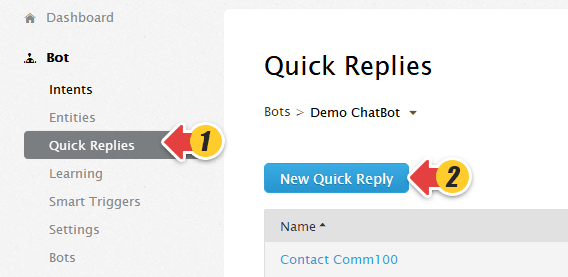
1. Click Quick Replies under the Bot menu, then click New Quick Reply.
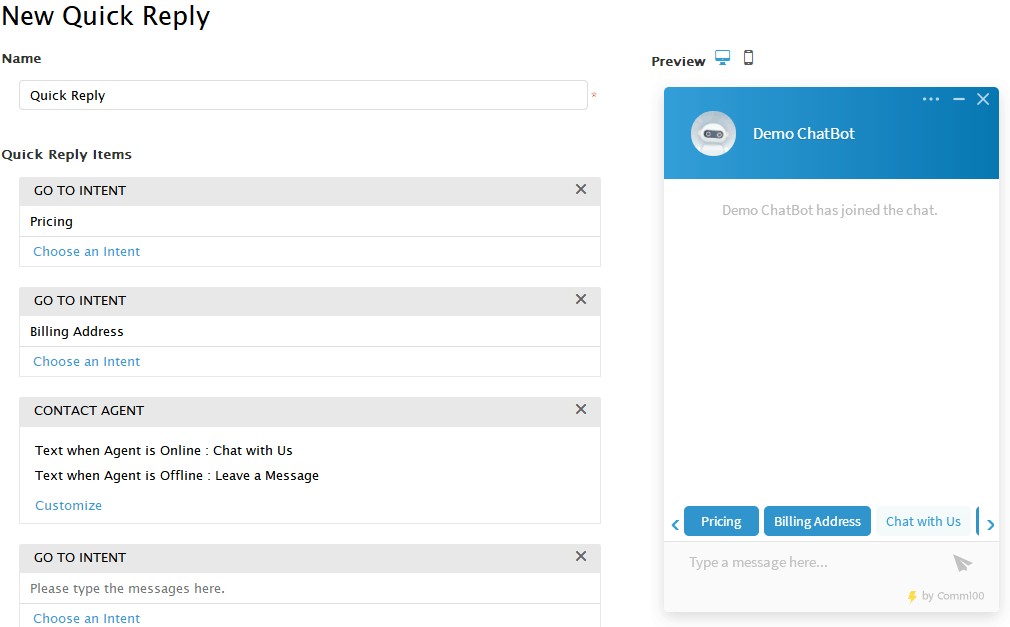
2. Name the Quick Reply and add select one of these options to define what will happen next: Go to Intent or Contact Agent.
- There is a 20-character limit for each quick reply name and item name.
- You can add up to 10 items in one quick reply.
- Go to Intent: Once the visitors click on the quick reply button, it returns the answer of that intent.
- Contact Agent: Visitors can click on the button to chat with online agents. The button text changes based on an agent’s status.
3. Save changes.
For every one of your Bot’s Intents, you can add one Quick Reply. It will be displayed at Bottom of the chat window.
Smart Triggers
Smart Triggers allow you to perform automated actions when certain event occur or conditions are met during while the bot is
chatting. These automated actions can include sending notifications to your agents, monitoring a chat, transferring a chat to a live
agent, adding a visitors to predefined Visitor Segment, etc.
Follow the steps below to create a new Smart Trigger.
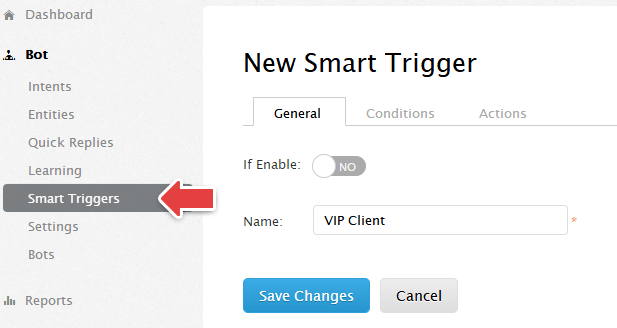
1. Click Smart Triggers under the Bot menu.
2. Enable it, and give the trigger a Name.
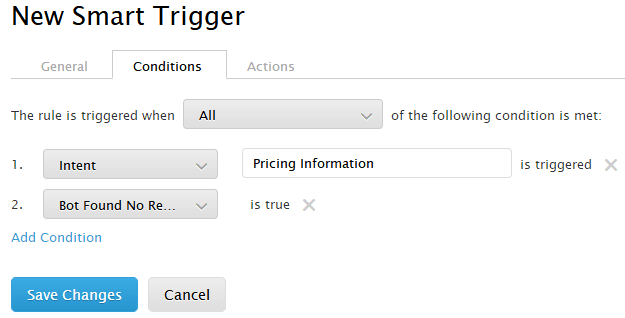
3. Set up the conditions for the rule to be trigged.
You can also use Bot specific conditions like a certain Intent being
triggered, Bot being unable to find a response, a visitor rating an answer as not helpful, etc.
4. Define the actions.
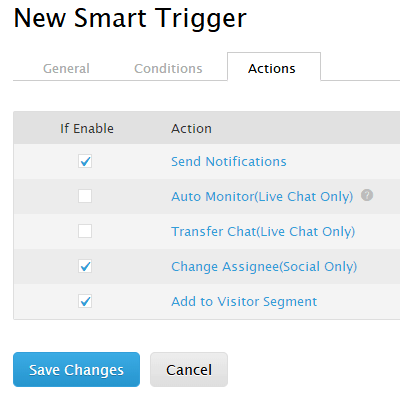
5. Save Changes.
Bot Learning
When the bot is asked a question it doesn’t have a High Confidence Answer to, it will keep track of it. This can help you enrich and optimize your Intent base. You can add visitor-asked-questions to your question base either by adding a new intent, or by adding it as a similar question of an existing intent.

Basic Bot Settings
Go to the Bot > Settings section, there you are able manage the basic settings for your Bot.
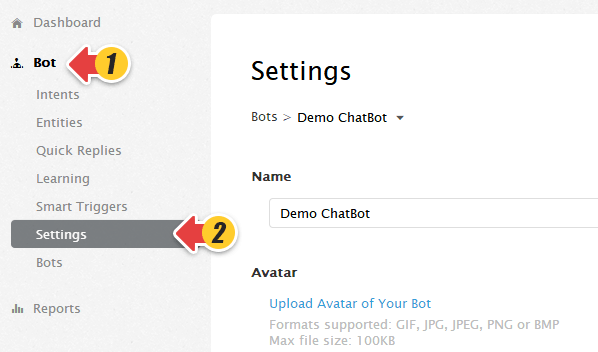
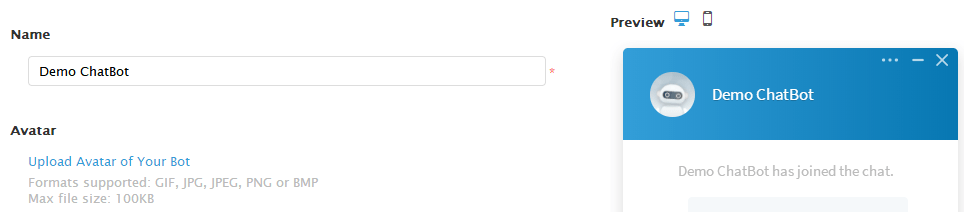
Customize Bot Name and Avatar
Go to the Bot that you have just created under the Bot module, click on the Chatbot Name and you can configure settings for a specific Bot.
You can define your own Chatbot Name and upload a customized image as the Avatar of your Chatbot.
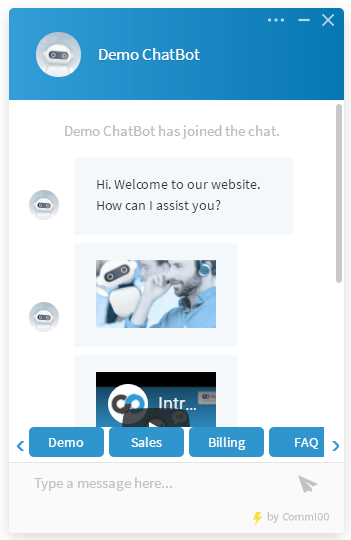
Greeting Message
The Greeting message is a pre-defined message which is sent by your Chatbot once the chat is started. Each Chatbot can have its own automatic greeting message.
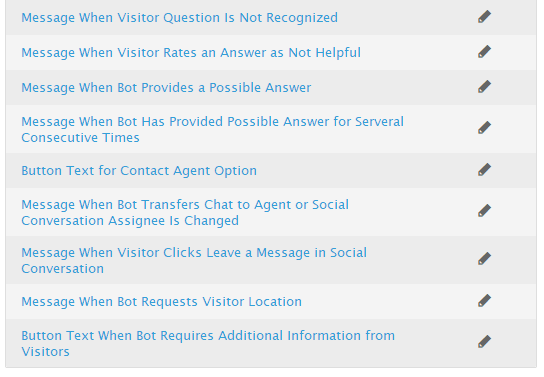
Bot Send Different Messages Based On Its Answer Scenarios
When Bot doesn’t know the answer to a visitor’s question, you can specify what a bot should say instead. When Bot returns an answer to your visitor, but the visitor rates it as Not Helpful, it can send a message with an apology and a suggestion to switch to a human agent. When Bot provides the same answer over and over, it can send a message recommending that they switch to a human agent.
You can customize whether Bot should include the Chat with Us button that allows your visitor to talk to your live agent at any time. The text on the button which reads Chat with Us can also be customized.
You can also preset messages to be sent when certain situations arise:
- When Bot Transfers Chat to an Agent or the Social Conversation Assignee Is changed.
- When Visitor clicks Leave a Message in a Social Conversation.
- When Bot Requests to know a Visitor’s Location.
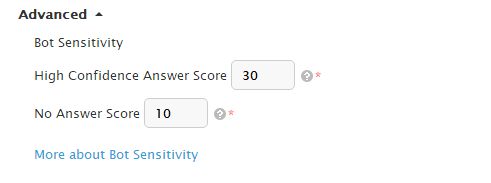
Bot Sensitivity
Clicking on the Advanced menu will extend the options for you to change Chatbot’s Sensitivity which determines how your Chatbot handles requests based on the confidence it has that it’s delivering the right answers. The sensitivity score range is from 0 to 100 and can be manually adjusted. This will change the score range of the returned “High Confidence Answers”, “Possible Answers” and “No Match Score Answers”. What is Chatbot Sensitivity.
Enable Comm100 Bot for your Campaign
By default, a new Chatbot isn’t attached to any campaign. You can Choose a Campaign to associate with that Chatbot.
1. Click Campaign from the left menu list;
Note: If you have multiple campaigns, please double check the name of the campaign in the upper-right corner of the page and make sure that you’re customizing the correct campaign.
2. Click on Bot menu and Enable it.
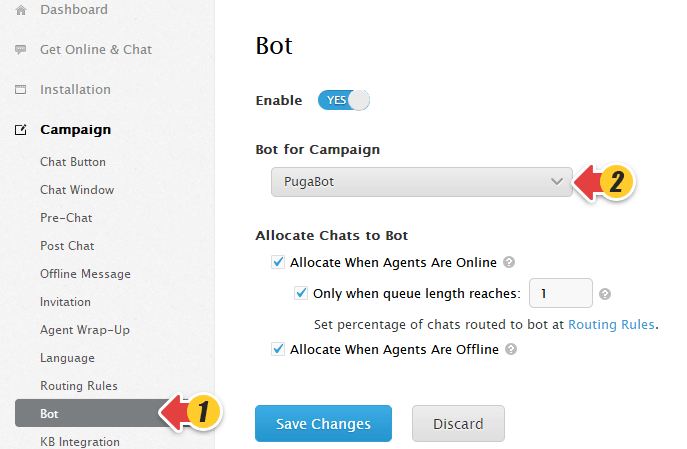
3. Select the Chatbot you want to use for that campaign from the Bot for Campaign Drop-down list.
Define When Chat Requests Will Be Distributed to Chatbot
To optimize your chat acceptance, you can select when the chat request should be distributed to Chatbot based on the chat queue length or a defined probability.
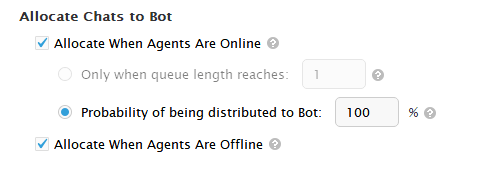
Only when queue length reaches 2 means when there is one visitor waiting in queue, the second queued chat request will be distributed to Chatbot. Note that this option only works when you’re set up to accept chat requests automatically.
Probability of being distributed to Chatbot: 50% means after a visitor initiates the request, there is a 50% chance that this chat request will be distributed to Bot. Note if you have enabled Routing Rules for your campaign, you need to set up the percentage under the Campaign> Routing Rules.

If you need any further assistance to help you get started with our self-learning AI powered Chatbot, feel free to talk with our live chat agents now!