To send/receive emails from/to Comm100 Ticket system, you need to set up and configure an email server first. After successfully linking an email server to the Ticket module, tickets will be created for all incoming emails to this email server.
Comm100 supports both POP3 mail servers and Microsoft Exchange mail servers.
Step by Step Instructions
-
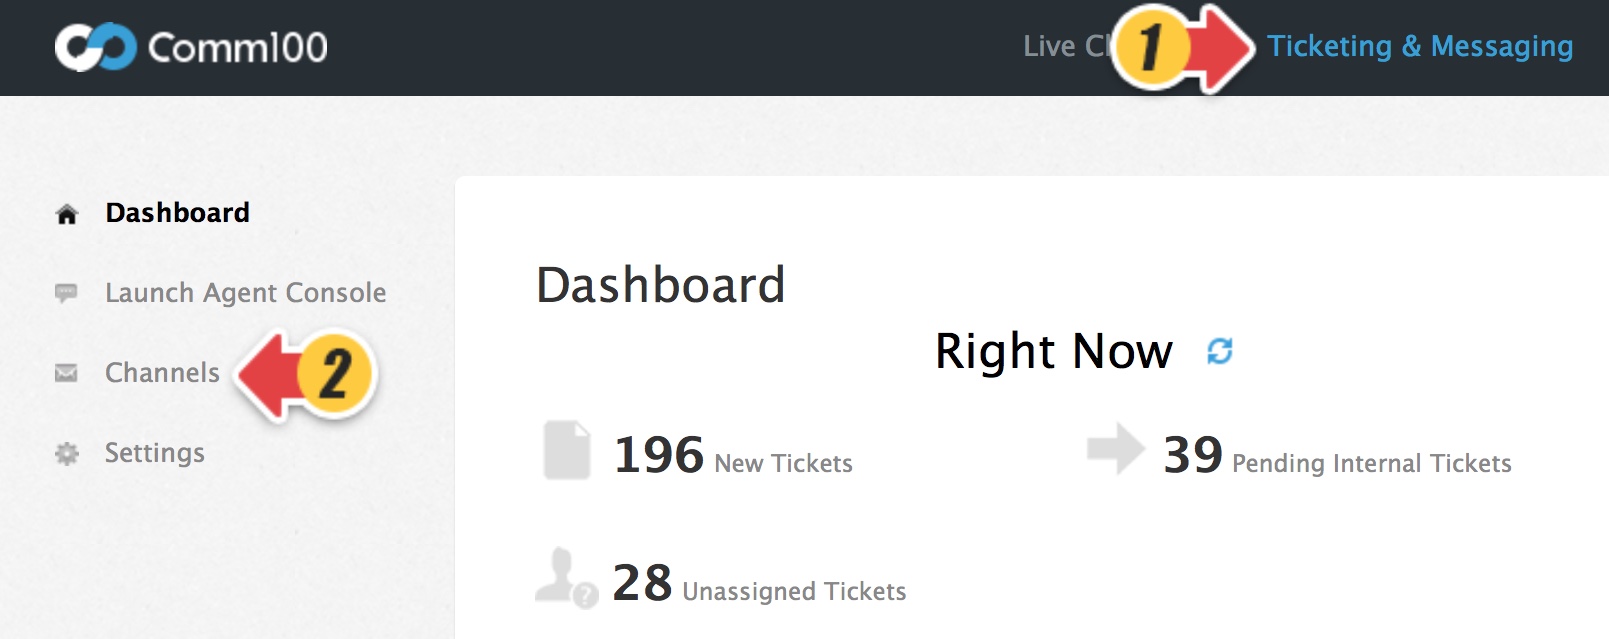
Log into your Comm100 Control Panel and go to Ticketing & Messaging module.
- Click Channels at the left menu.
- Select Email channel, Click New Email Account, you can add POP3 Server or Microsoft Exchange Server.
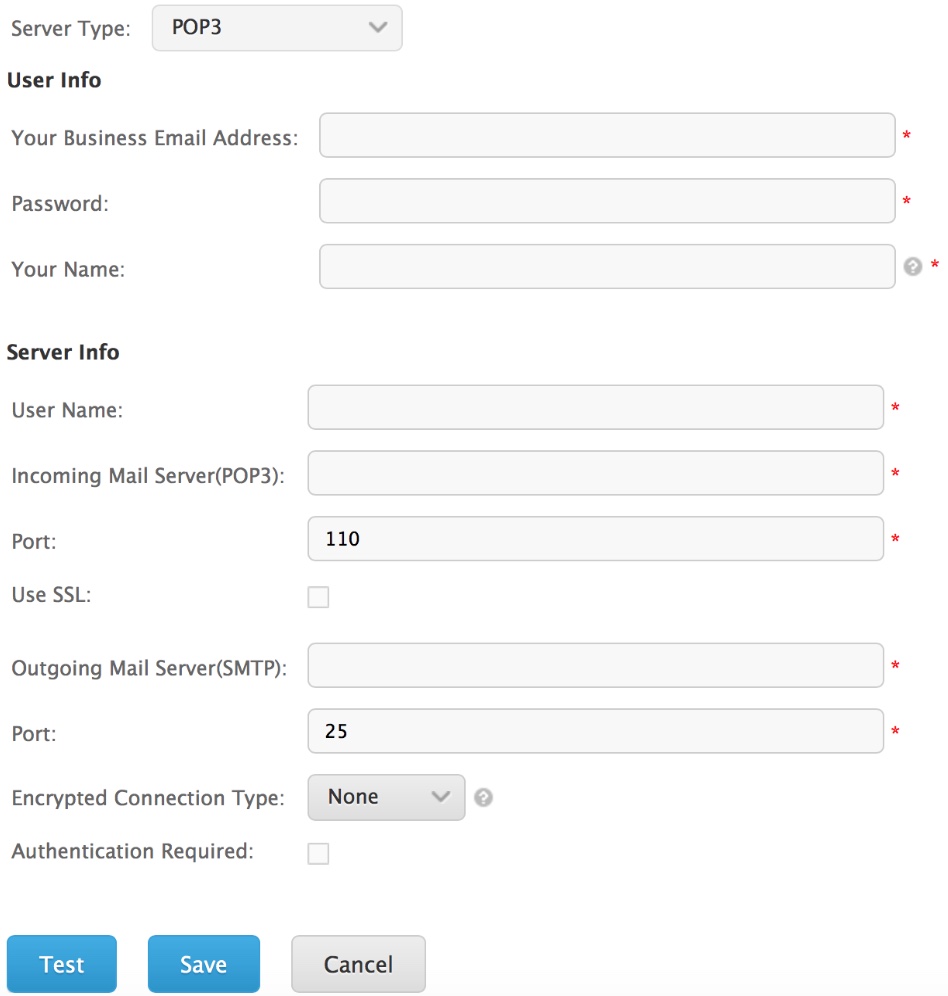
Add POP3 Server Type Email Accounts
Post Office Protocol 3 (POP3) is the most common e-mail account type. All your incoming emails to that email account will be generated as tickets after it has been successfully added. Messages that you send from your Ticket module usually do not appear in the Sent folder of your email server.
-
Input your email account information.
In the Your Email Address field, please input your complete e-mail address assigned by your mail administrator or email service provider (ESP). Make sure to include your user name, the @ symbol, and the domain name, for example, example@yourdomain.com.
In the Your Name field, please input the name you want your recipients to see. For example, Comm100 Customer Care Team.
-
Set up the Incoming Mail Server.
Your email service provider (ESP) or e-mail administrator can provide you with the mail server configuration information that you need to manually set up your e-mail account in Comm100 Ticket.
In the User Name field, please input your user name provided by your ESP or mail administrator. This might be just the part of your e-mail address before the @ symbol, or it might be your complete e-mail address.
In the Password field, please enter the password provided by your ESP or mail administrator, or the one that you use for your email account. Your password might be case sensitive. Make sure that your CAPS LOCK key isn’t on.
-
Set up your own Outgoing Mail Server.
With Your Own SMTP Server, your ticket emails are sent out via the servers where your email address lives. Your email address will be displayed as the “From Address” in all mail programs. Please note that the sending limits (like the number of emails sent per day, the number of recipients per email, the maximum message size, etc) are restricted by your SMTP server.
Add Microsoft Exchange Server Type Email AccountsComm100
Comm100 Ticket supports Microsoft Exchange server 2007 with SP1 or above. After you successfully add an exchange server into your Ticket module, tickets will be created for all incoming emails to this email server, and the ticket messages that you send out will appear in the Sent folder of your exchange server.
-
Input your Email account information.
In the Your Business Email Address field, input your full email address assigned by your ESP or mail administrator. For example, example@yourdomain.com. In the Your Name field, input the name you want your recipients to see.
-
Input your Exchange Mail Server information.
Your User Name is provided by your ESP or mail administrator. Of it is the portion of your email address before the @ symbol or your full email address.
Input the URL of your exchange web server. A typical Exchange Web Server URL looks like: http://mail.yourdomain.com/ews/exchange.asmx
-
- Click Test to verify your configuration information.
Note: If the test status is “Failed”, please double-check the settings, such as your email address, user name, password, Incoming Mail Server, Port or Exchange Web Server URL and then try again. -
Click Save to finish your configuration.
-
A verification email will be sent to your email account. Please click the link in the verification email to activate the email server.


Note:
If you are using a corporate Gmail account and the above-mentioned method does not work for you, here is an alternative method.
- Enable 2- step verification for your Gmail Account. Refer to the Step 1: Set up 2-Step Verification of this guide.
- Create an APP password for your Gmail Account. Details here.
- Use your email address and APP password to finish the integration.