Step 1 Set a go-live aim date for live chat and ticketing & messaging
If you’ve bought both live chat and ticketing & messaging functions within our platform, you might choose to either:
- Go live with live chat and ticketing & messaging at the same time
- Go live in phases, launching channels one-by-one
|
Go-live plan |
Advantages |
Disadvantages |
|
Go live with live chat and ticketing & messaging at the same time |
Faster time to go live |
Learning curve can be more challenging – staff have to learn all channels at the same time |
|
Go live in phases, launching channels one-by-one
|
Learning curve can be easier – staff get used to one channel before attempting to master another
Learn from experiences of launching one channel before attempting others |
Slower time to go live |
What about AI Chatbot?
If you are integrating our entire platform including AI components such as Chatbot and Agent Assist, a different approach will likely be required.
We recommend a phased, knowledge-centric go-live strategy to allow for knowledge resources to be gradually built up and tuned via AI.
Our team will work with you to create a custom timeline and strategy.
Step 2 Form your live chat rollout team
The first step to going live on your system is to identify the different people who will help with the rollout of your new software, as well as administer it on an ongoing basis.
The range of people involved could be quite different depending on the scale of your rollout.
 |
 |
|
If you have a smaller rollout with just a handful of agent seats, it’s likely that you’ll have two main types of people interacting with your system:
|
If you have a larger rollout with lots of agent seats, it’s likely that there will be many more types of people interacting with your system, for example:
|
There might be other roles, and some roles might overlap. Depending on the types of people involved with your rollout, it’s likely that these different groups of people will have different responsibilities and permissions required within the live chat system. For each of the tasks within this guide, it’ll be up to you to decide which people are responsible for which parts of your rollout, and allocate different tasks to them.
Step 3 Make global functionality decisions
Set up users
Any of your team members who will need to use the Comm100 platform will need to have a unique Comm100 account.
Learn more on how to set up system users in our knowledge base article.
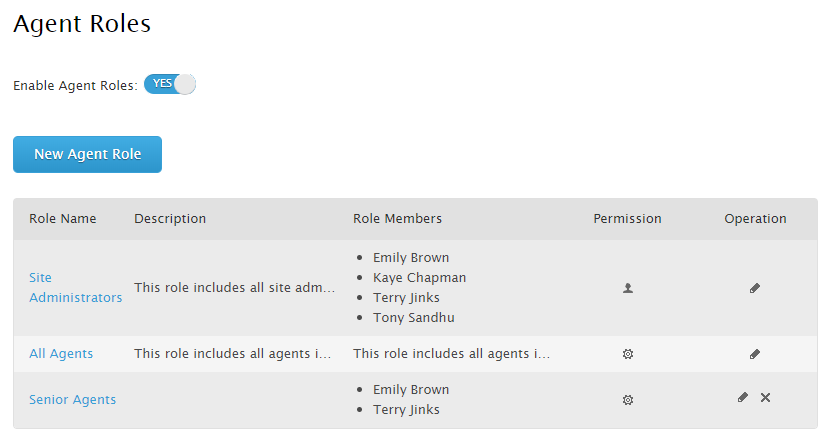
Assign user roles and permissions
Once you have set up users, you’ll need to decide which permissions each user (or group of users) should have. Roles and permissions dictate which users can perform what actions in the Comm100 system. Roles allows you to assign different permission to a group of agents. By default, there are two types of different group roles within the platform which have different default permissions associated with them – Administrators and Agents.
Administrators can access and amend everything within the Comm100 platform, including the look, feel and behavior of the platform. Agents have a more limited set of things they can do which are more appropriate for basic live chat operators.
You’ll need to review the permissions assigned to agent and administrator groups to see if they’re appropriate for your team.
You can also set up custom roles. If you identified users in step 1 who need to perform functions a little above what regular agents can do, but not quite to the level of full system administrators, you can set up a custom role for the user and assign permissions to the group.
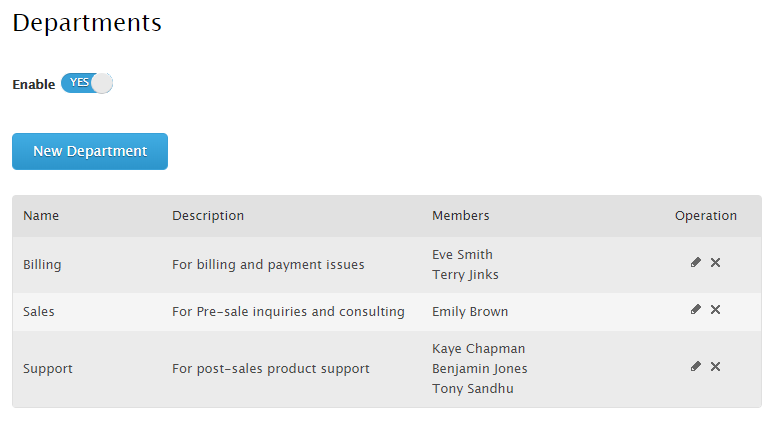
Set up Departments
If you have several teams of agents that handle specific query types, geographies, products or services, setting up departments is an effective way to handle chat routing and reporting for these separate teams.
Learn more about setting up departments in our knowledge base article.
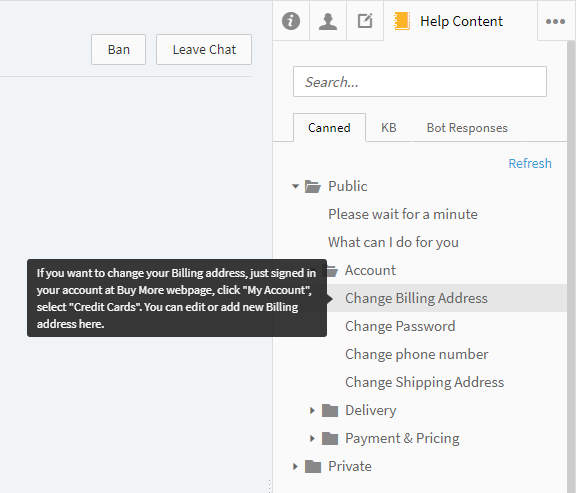
Create canned messages
Canned messages are pre-saved sections of text that agents can instantly add into their chats and messages. They’re a great time saver for agents and useful to ensure consistency in responses that are commonly used with customers.
Learn more about canned messages in our knowledge base article.
Step 4 Make Live Chat functionality decisions
Here are the core decisions you’ll need to make about how customers will interact with your live chat platform.
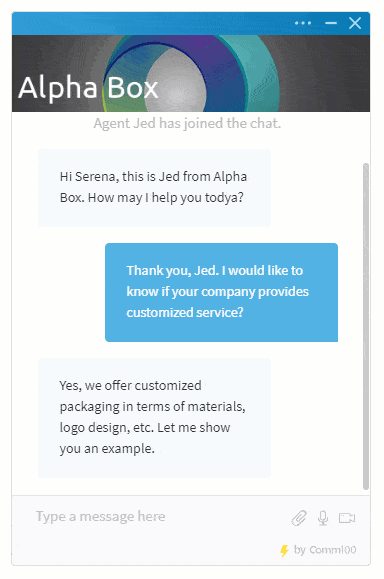
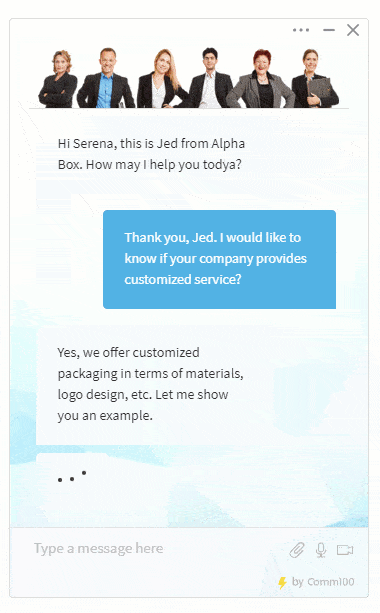
Decide what your chat system should look like
The look and feel of your chat system can be easily customized using our template library. The two main areas of the chat system that your customers will interact with are the chat button and chat window.
Chat button
The chat button will sit on your website or in your mobile app and act as the gateway to your chat system.
You’re probably familiar with interacting with a chat button from your own personal experience. We have a library of buttons you can use, or you can upload your own image as a chat button.
Find out more about Chat buttons in our knowledge base article.

Chat window
Customers will interact with your agent team using the Chat window. Like the chat button, this can be customized using our template library.
You can also use JavaScript or CSS code to create a chat look and feel unique to your brand.
Find out more about chat windows in our knowledge base article.
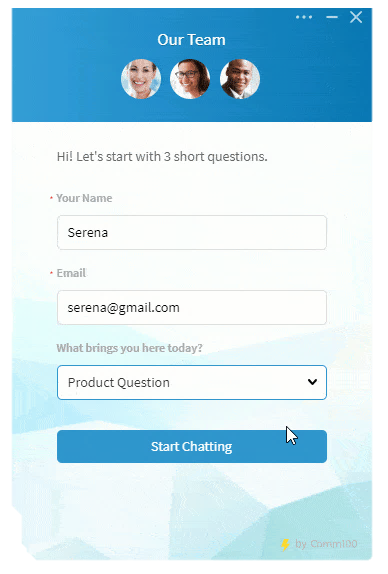
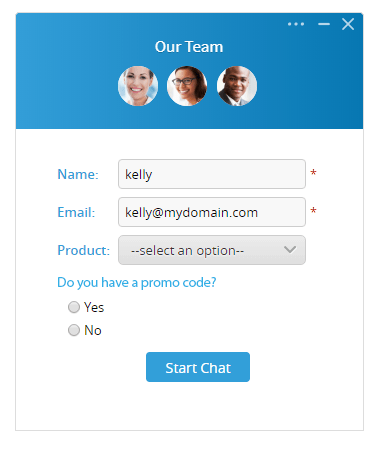
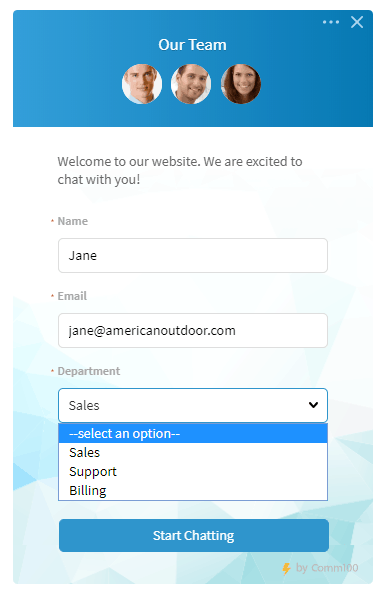
Decide whether to collect customer information via a pre-chat form before chats begin
Many of our customers choose to show a pre-chat form to the customer before they connect to an agent. The form can collect information like name and email address as a way to save agents from having to ask for this information every time.
The chat system can also use the customer information to aid with routing the chat to the correct department or agent. Read more about this in the Routing section of this guide.
Learn more about pre-chat forms on our information page.
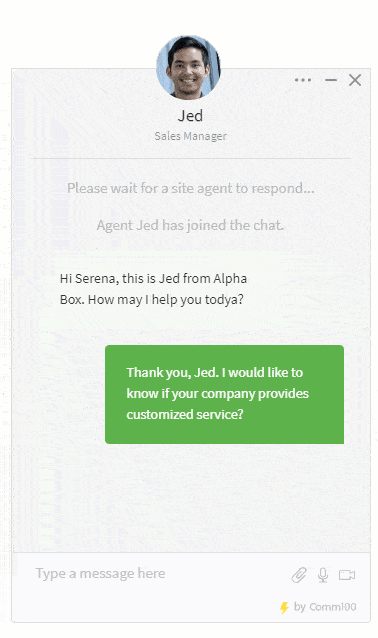
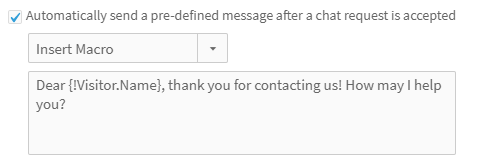
Decide how agents should greet customers
Each agent can set up an automated greeting to be sent to customers at the point a chat gets connected to them. Leaving this option switched off means that agents will need to type out a greeting every time a chat begins.
Greetings are configured per-agent within the Agent Console. If you wish for all agents to greet customers in the same way you’ll need to create a greeting and then send this to them to save within their Agent Console.
You can even use information from the pre-chat form in the greeting to automatically greet the customer by name.

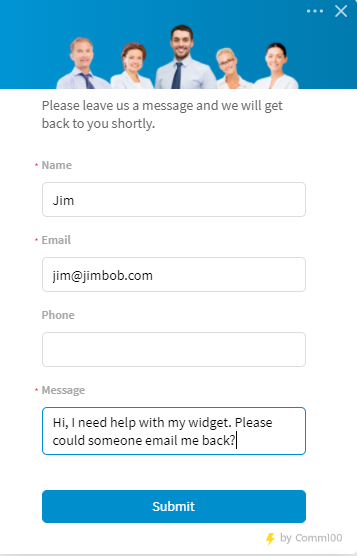
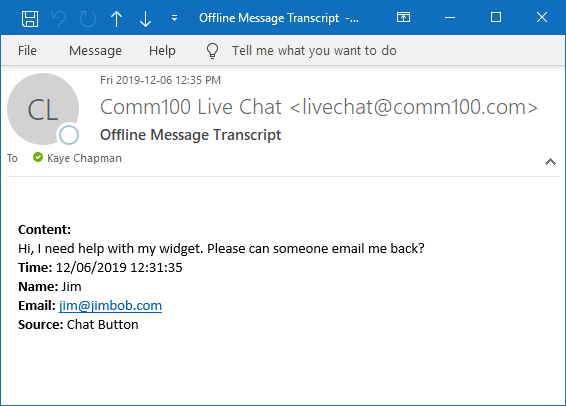
Decide whether to let customers leave messages when your agents are offline
Your chat system can use an Offline message form to collect messages from customers even when your agent team is not working. The details from the form can then be emailed to email addresses of your choice for follow-up.
Learn more about configuring offline messages in our knowledge base article.
Alternatively, you can choose for the offline message function to be hidden so that when your agent team is offline the chat button is not visible.
Learn more about hiding the offline chat button in our knowledge base article.
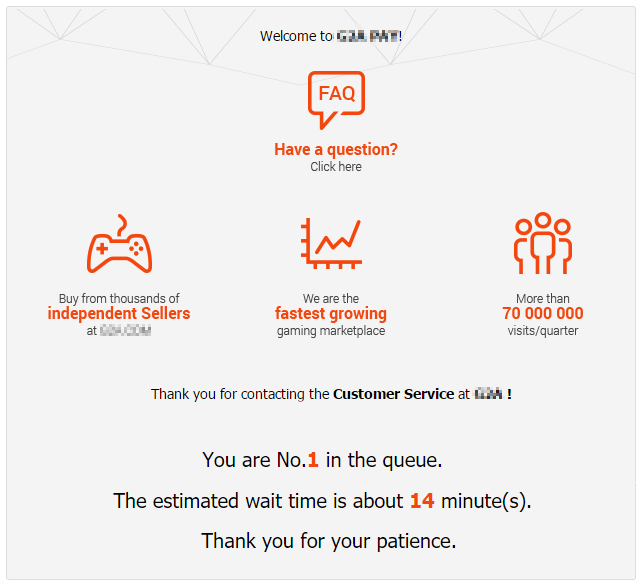
Decide how to configure queue options
The queuing function in Comm100 live chat is enabled once you switch on Auto Allocation and set a maximum chat number for each agent. Once that chat limit is hit, extra incoming chat requests will be sent to a queue.
You can also allow queued visitors to use the offline message form instead of waiting for an agent.
Learn more about queueing in our knowledge base article.
Decide what customers should be able to do during chats
You can choose to enable or disable a number of features that customers can use during chats, including:
- Download chat transcripts
- Print chat transcripts
- Email chat transcripts
- Send files
- Request audio/video chats
Learn more about customer chat options in our knowledge base article.
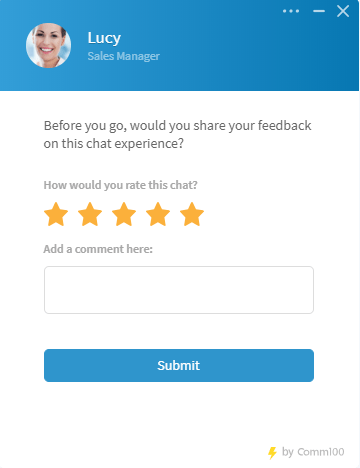
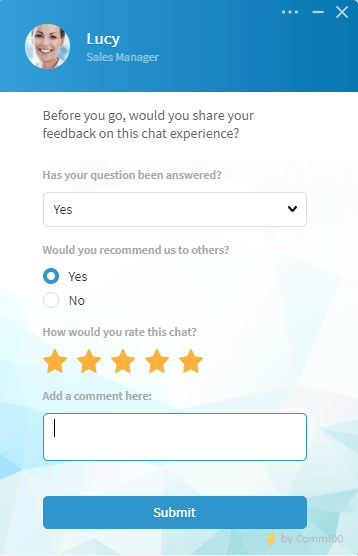
Decide whether to use a post-chat survey
Post-chat surveys are a great way to collect customer feedback about your chat service, providing you with helpful metrics and comments that allow you to improve the service you provide.
By default, our post-chat form contains a five-star rating and a comment box, but you can configure the survey to use the Net Promoter Score format or collect whatever data you like.
Learn more about post-chat surveys in our knowledge base article.
Decide whether to run one or multiple instances of chat
If you have a single brand/website, you likely only need one instance of chat.
If you’re looking to run different instances of chat with different looks and behaviour, embedding the different instances on different websites or website sections, you’ll need to set up Multiple or Dynamic campaigns.
Learn more about multiple and dynamic campaigns in our Whitepaper.
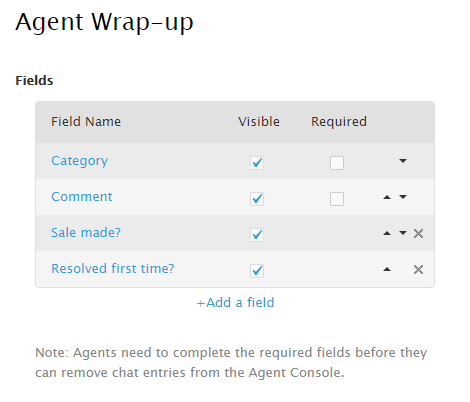
Decide whether post-chat wrap-up is needed
Wrap-up after each chat can be helpful for record-keeping or compliance purposes. You can choose to make the wrap-up fields in our system mandatory to complete, meaning an agent cannot close down a chat with a customer without completing wrap-up.
Or, you can leave the fields as optional, meaning agents can skip them out.
Learn more about wrap-up in our information page.

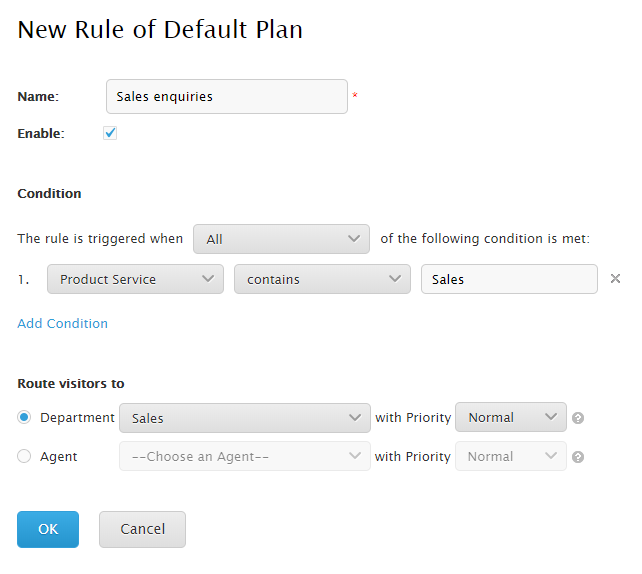
Get the right chats to the right agents
Here, you’ll need to adjust settings to ensure that chats get allocated to the right agents.
Do I need to set up routing?
If you’ve needed to set up departments, routing is how you get chat requests to those departments. Alternatively, if you have a smaller agent team, you can use routing to send specific query types to specific agents.
Learn more about routing to departments or agents in our knowledge base article.
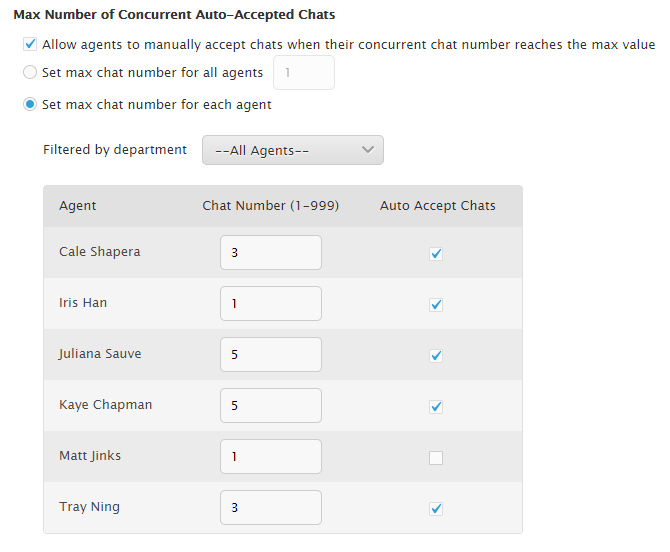
Do I want chats allocated to agents automatically?
Most of our customers choose to automatically allocate chats to their agent team. This speeds up the process of chats coming through to agents, meaning that the customer does not need to wait for an agent to manually pick up the chat.
Auto allocation means that chats get allocated directly to agents. If you leave auto allocation switched off, agents will need to pick up chats manually.
At the same time you turn on auto allocation, you’ll need to also configure a maximum chat limit for agents so they don’t get overwhelmed with automatically allocated chats if your chat system gets very busy. Once the chat cap is reached, any extra chats will go into a queue.
Learn more about auto allocation in our knowledge base article.
Step 5 Make Ticketing & Messaging Functionality Decisions
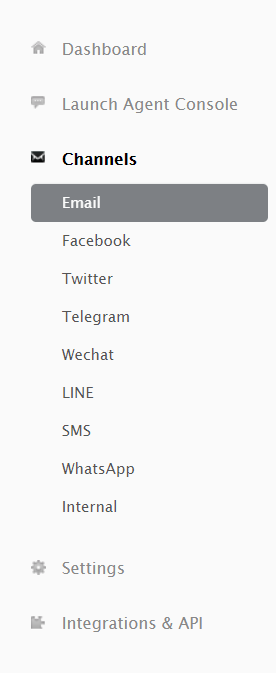
Decide which channels to integrate
You can choose to integrate any number of Email accounts, Facebook, Twitter, Telegram, WeChat, LINE, SMS, and WhatsApp.
To learn more about integrating different channel accounts with Comm100, see this article.
Get the right tickets sent to the right agents
Like live chat, you’ll need to use routing and allocation to get tickets sent through to appropriate agents or departments.
Do I need to set up routing?
If you’ve needed to set up departments, routing is how you get requests to those departments. Alternatively, if you have a smaller agent team, you can use routing to send specific query types to specific agents.
Learn more about routing to departments or agents in our knowledge base article.

Do I want tickets to automatically allocate?
Automatic allocation in ticketing & messaging means that agents do not need to pick up tickets manually – they get assigned a selection of tickets which
If you leave auto allocation switched off, agents will need to pick up tickets manually.
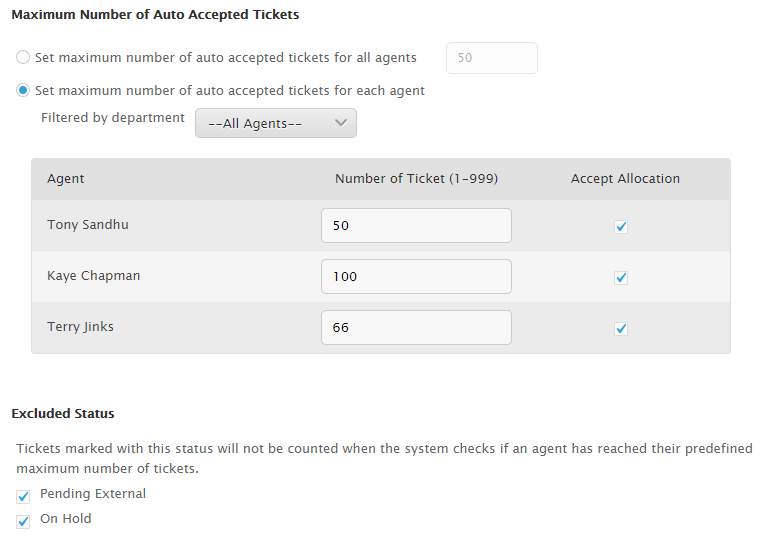
At the same time you turn on auto allocation, you’ll need to also configure a maximum ticket limit for agents so they don’t get overwhelmed with automatically allocated tickets if your ticketing & messaging system gets very busy.
Set up Triggers
Triggers allow you to automate a number of actions within the ticketing & messaging system on an “if this, then that” basis.
When certain conditions are hit, you can have the system change a ticket’s attributes such as status, priority or assignees.
You can also have the system send out automated messages to customers.
You can get these two different ways of automating system actions working together. For example, if a ticket is pending a customer response and has been for a week, you could trigger the ticket’s status to change to closed and send an automated email to the customer letting them know their query has been closed.
Learn more about Triggers in our knowledge base article.
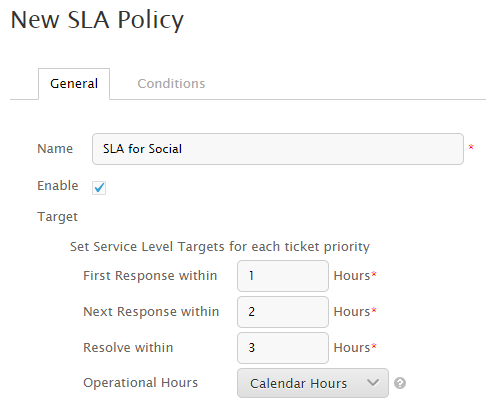
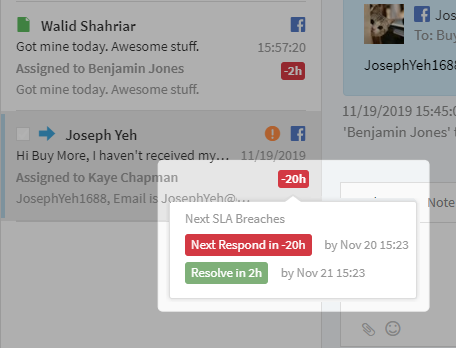
Set up SLAs (Service Level Agreements)
If your company uses SLAs to manage tickets, you can configure these within the ticketing & messaging system.
SLAs for different measures can then be seen within the Agent Console.
Learn more about SLAs in our knowledge base article.
Add in working times and holidays
You’ll need to configure working times and holidays in your system to ensure that a number of features work properly.
If you use the SLA feature, having a correct view of the hours your team is working is essential to ensure the clock displays the correct time.
Working times and holidays also affect the ticket duration reflected in reports as well as being used to count days if they’re used in trigger rules.
Learn more about Working Times & Holidays in our knowledge base article.
Step 6 Going Live
Book agent training
You’ll need to prepare your team for the launch of your live chat system. A great way to do this is by booking in with our trainer team for specialised live chat agent training, delivered over webinar to your agent team. Contact your account manager to find out more.
Email user links and login details
You’ll need to instruct your agent and manager teams how to log into the agent console, as well as issue them with their logins for the platform that you created in step 3.
Bringing Live Chat live
Install the live chat code on your webpages once you’re ready to go live. Once this is done, your live chat system will be up and running!
Learn more about installing the live chat code in our knowledge base article.
Bringing ticketing & messaging live
Once you have integrated your email or social media accounts with the Comm100 ticketing & messaging system, your agents will be ready to start handling queries sent to those accounts through the Agent Console.
Step 7 Help Managers manage Live Chat and Ticketing & Messaging
Once your chat system is live, people managing your agent team will have specific tasks to perform to make sure that chats and tickets are being managed smoothly and appropriately by your agents.
Manager functions in the Agent Console
Typically, managers will be responsible for monitoring ongoing chats, and they can also join them if they need to. They’ll also need to set agents away or kick them off the system if they leave themselves logged in accidentally.
Learn more about manager agent console functions in our information page.
Live Chat History
The History area within the Control Panel allows system users to access chat transcripts. This can be useful for managers to check chats for quality assurance purposes.
Learn more about History in our knowledge base articles.
Ticketing & Messaging History
Ticketing & Messaging Histories can be accessed through the Agent Console itself. Just search keywords or message IDs in the search box.
Learn more about how to access the history of each channel in our knowledge base articles.
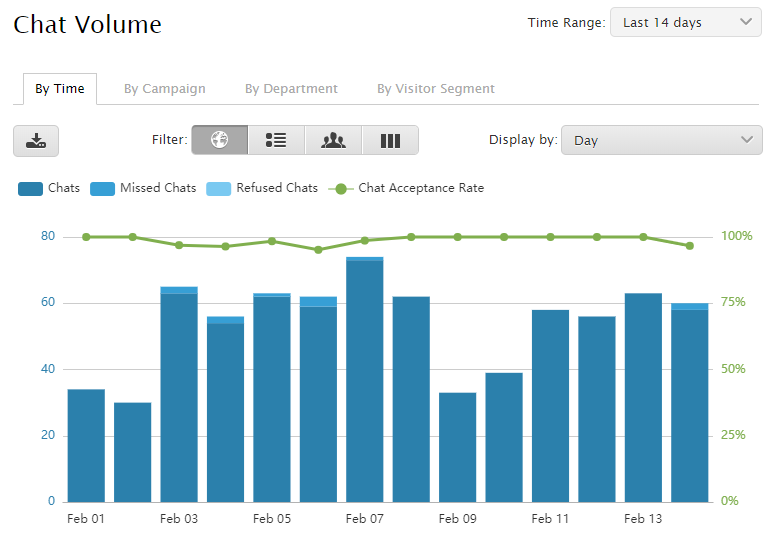
Reporting
The Comm100 reporting suite contains a wealth of reports that help managers and other system users monitor and measure a range of performance metrics, including volume, agent efficiency, post-chat ratings and more.
Learn more about Reporting in our knowledge base articles.
Sales-Specific Live Chat tips
If you’ll be using live chat for e-commerce or customer acquisition, here are some tips to help you make the most out of your Comm100 deployment.
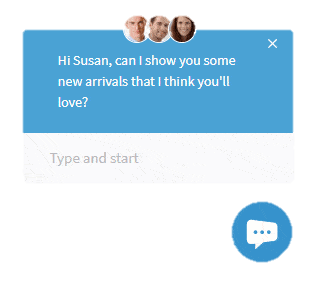
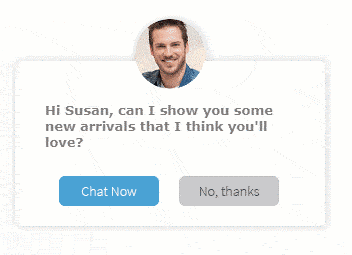
Proactive chat
By engaging your website visitors through proactive chats, you can potentially turn more visitors into customers. Invites to chat can be sent automatically based on certain criteria (for example, VIP status or shopping cart value) or manually by your agent team.
Learn more about proactive chat on our information page.
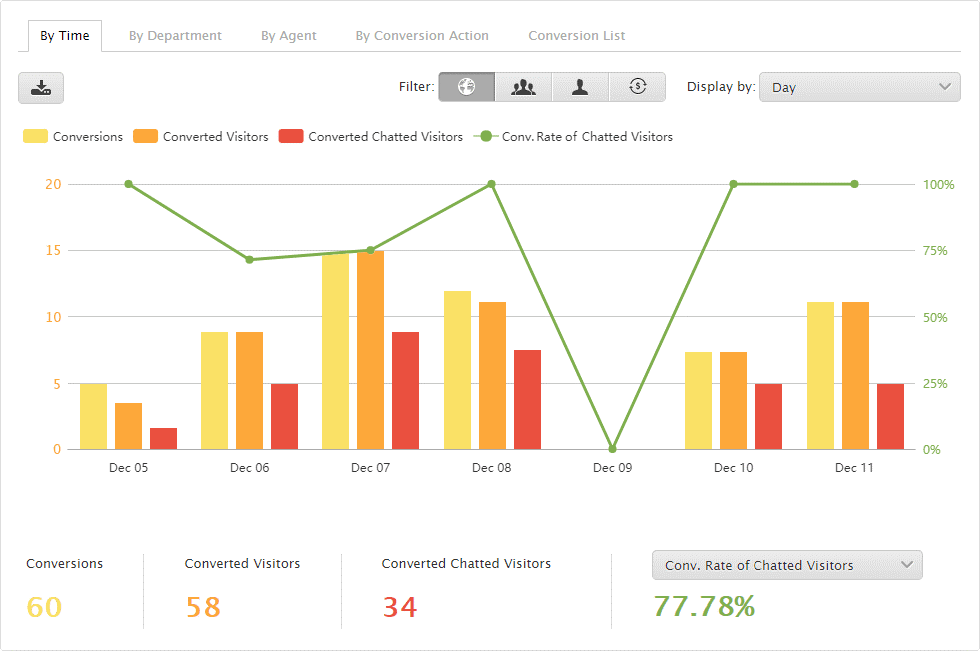
Conversions
Comm100’s Live Chat Conversions feature links together live chat data with your onsite data, allowing you to view how chats drive your customers to convert on your site. This allows you to assess what types of chats are most useful in encouraging visitors to convert, as well as assessing exactly how much live chat contributes to the actions that sustain your business. You can determine what a conversion means based on your unique needs.
Learn more about conversions in our knowledge base article.
Security-specific Live Chat tips
If your organization is highly security-conscious, Comm100 has a wealth of features to allow you to implement stricter security controls on your live chat system.
Learn more about live chat security features and practices in our white paper.
Integrations with other systems
The Comm100 platform comes with a range of built-in integrations to common contact center, eCommerce and customer communication systems. We also offer a robust API layer to connect our platform to other systems your organization uses.
Learn more about integrations and APIs in our information pages. Get in touch with us if you’d like to discuss getting these set up.