Comm100 Live Chat is a digital customer service platform that allows you to serve your customers in a real-time environment and improve agent efficiency.
Cisco Finesse is the next-generation application that provides omnichannel support using its Finesse desktop. The Finesse desktop interface enables agents to take customer calls and other call-related features to provide an optimal user experience.
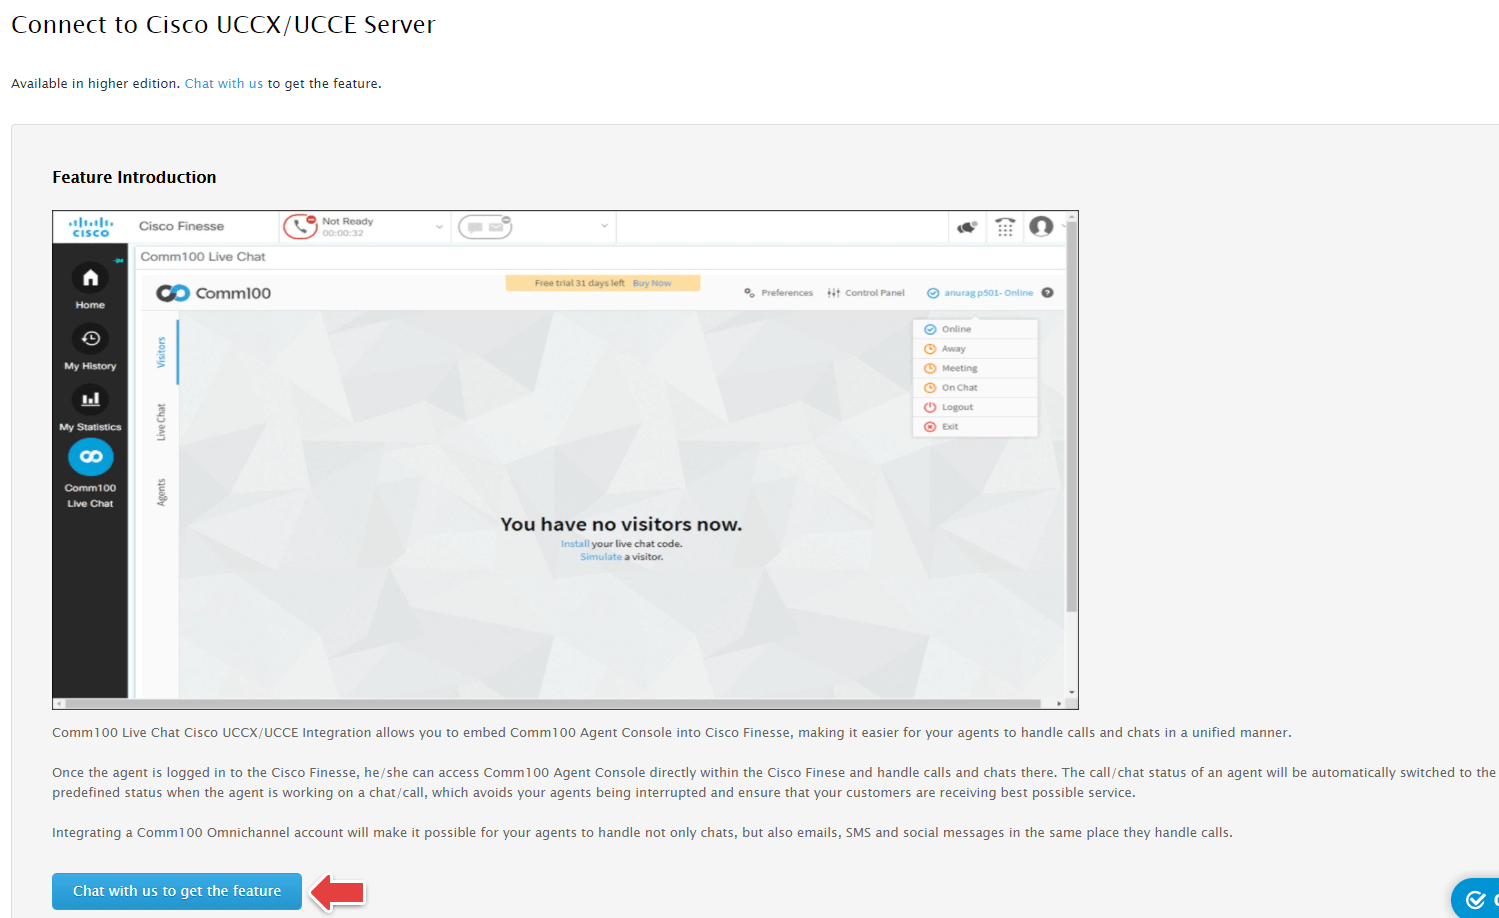
Comm100's integration with Cisco Finesse allows you to add Comm100 Live Chat to your Cisco Finesse desktop. It takes a single click to run Comm100 Agent Console from the Cisco Finesse desktop with seamless auto-login. Cisco agents can manage chats, emails, SMS, and social messages in the same place they take calls, with an optimal time spent switching between calls and with the customers.
Follow the step-by-step instructions to see how you can easily integrate Comm100 Live Chat with the Cisco Finesse desktop.
Step by Step Instructions
A Comm100 administrator or agent having the correct permissions also needs to have the Cisco administrator Login ID and Password to manage the Cisco Finesse integration with Comm100 Live Chat.
As a Comm100 administrator or agent, please follow these steps:
- Log in to Comm100 Control Panel.
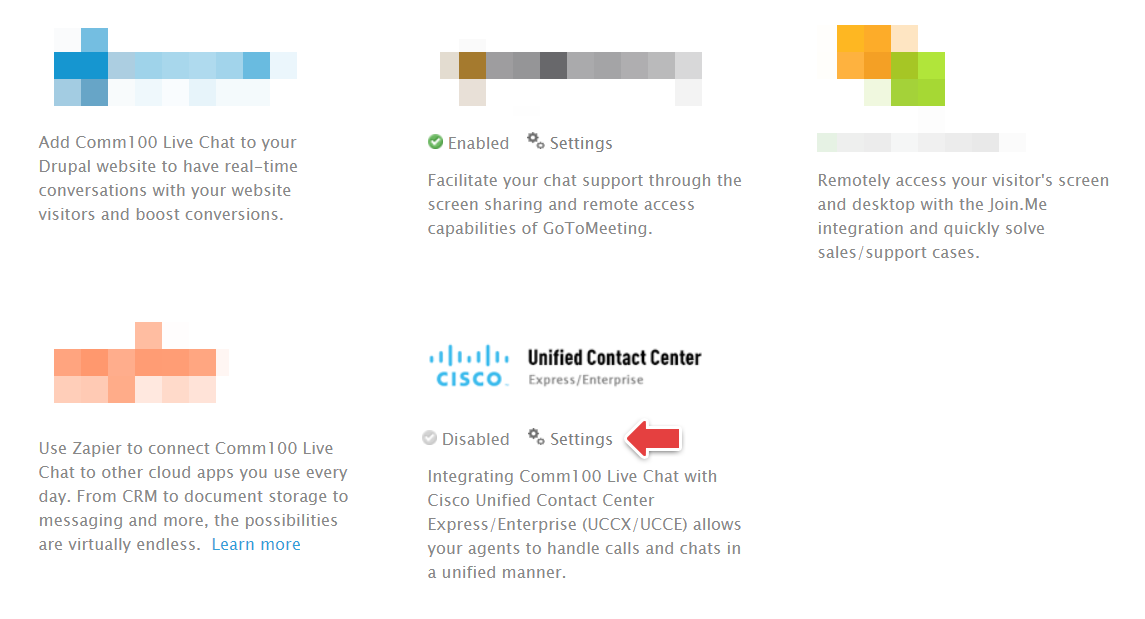
- On the Live Chat tab, from the left menu, go to Integrations & API > Cisco Unified Contact Center.
- Click Settings.
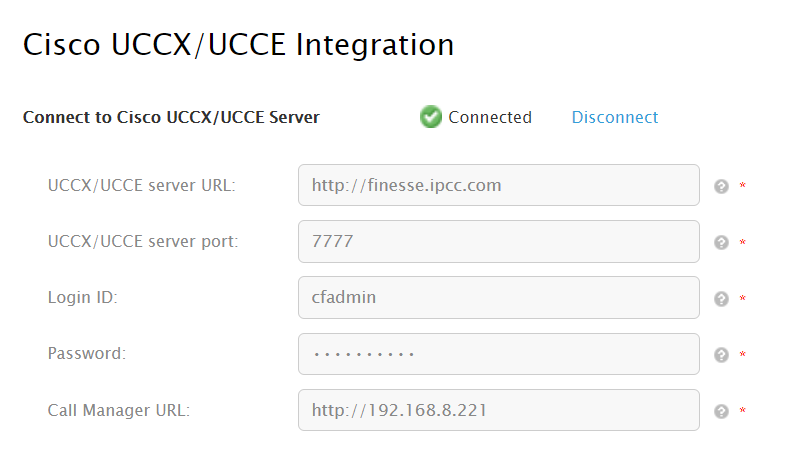
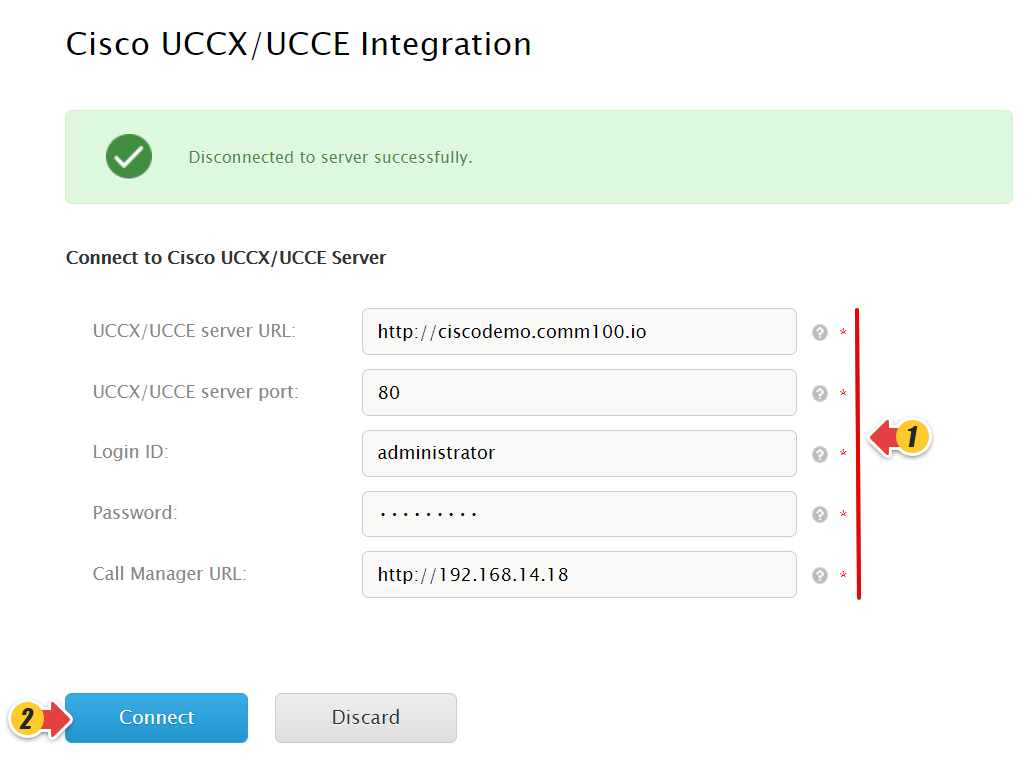
- Once the Cisco Unified Contact Center App is enabled, provide the Cisco UCCX/UCCE details to connect to the server:
- UCCX/UCCE server URL: The URL of your Cisco UCCX/UCCE server. It can contain a string of up to 256 characters.
- UCCX/UCCE server port: The port of your Cisco UCCX/UCCE server. It can contain a string of up to 16 characters.
- Login ID: The administrator login ID of your Cisco UCCX/UCCE Finesse account. It can contain a string of up to 256 characters.
- Password: The administrator login Password of your Cisco UCCX/UCCE Finesse account. It can contain a string of up to 256 characters.
- Call Manager URL: The URL of your Cisco Call Manager server. It can contain a string of up to 256 characters.
- Click Connect.
- Once you are connected to the Cisco UCCX/UCCE server, you can do the following:
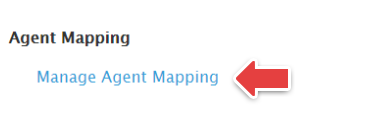
- Map the Comm100 agents with Cisco agents. Click the Manage Agent Mapping link to open the Agent Mapping page.
- Set agent call and chat status.
- Map the Comm100 agents with Cisco agents. Click the Manage Agent Mapping link to open the Agent Mapping page.
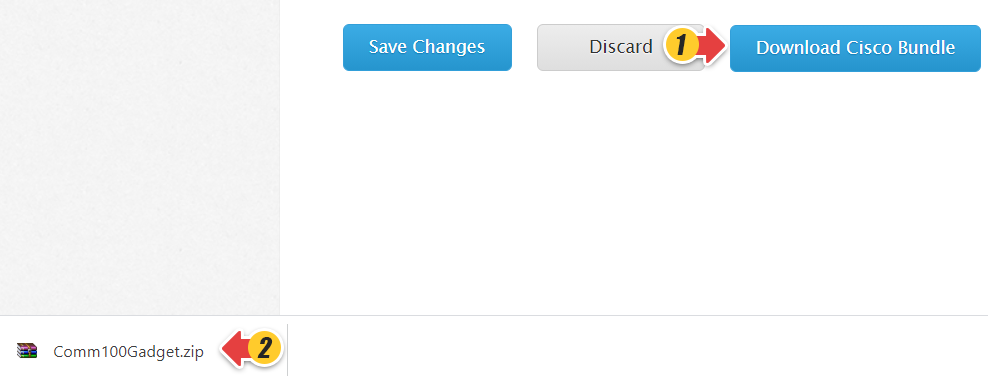
- Click Save Changes.
- Click Download Cisco Bundle to download and install the Comm100 Gadget.zip file on your Cisco Finesse environment.
- Configure 3rd party.
- Log in to Cisco Finesse and configure the master layout of the Finesse desktop.
<role>Agent</role>
<tab>
<id>comm100</id> <icon>/3rdpartygadget/files/Comm100Gadget/comm100logo.png</icon> <label>Comm100 Live Chat</label>
<columns>
<column>
<gadgets> <gadget>/3rdpartygadget/files/Comm100Gadget/commgadget.xml</gadget> </gadgets>
</column>
</columns>
</tab>
<role>Supervisor</role>
<tab>
<id>comm100</id> <icon>/3rdpartygadget/files/Comm100Gadget/comm100logo.png</icon> <label>Comm100 Live Chat</label>
<columns>
<column>
<gadgets> <gadget>/3rdpartygadget/files/Comm100Gadget/commgadget.xml</gadget> </gadgets>
</column>
</columns>
</tab>
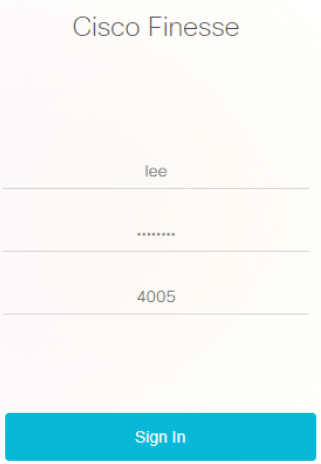
- Log in to Cisco Finesse terminal using SSH/Telnet as a Cisco administrator.
- Login with cfadmin.
- Reset and confirm your password.
$utils reset_3rdpartygadget_password
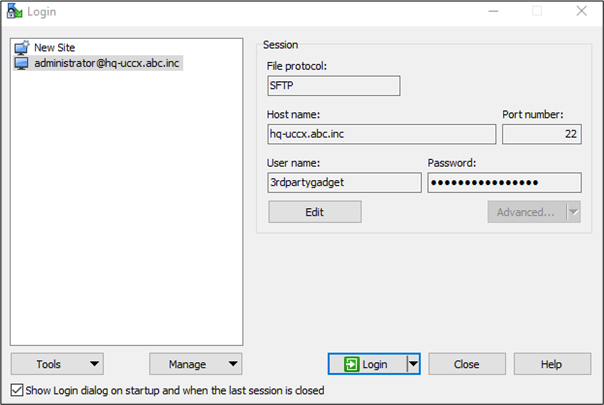
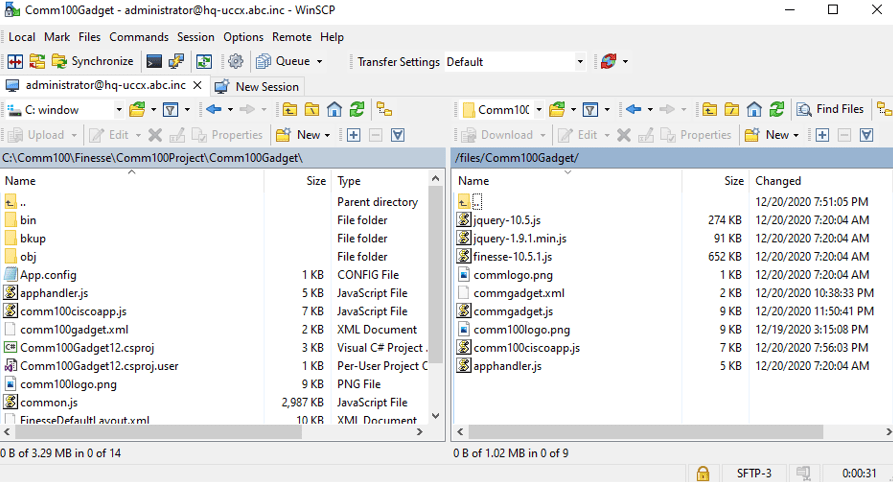
- Configure secure ftp account. For example, WinSCP.
- Create a folder with the name: Comm100Gadget and move the Comm100Gadget files to the Comm100Gadget folder.
Note: The name of the folder should be case sensitive.
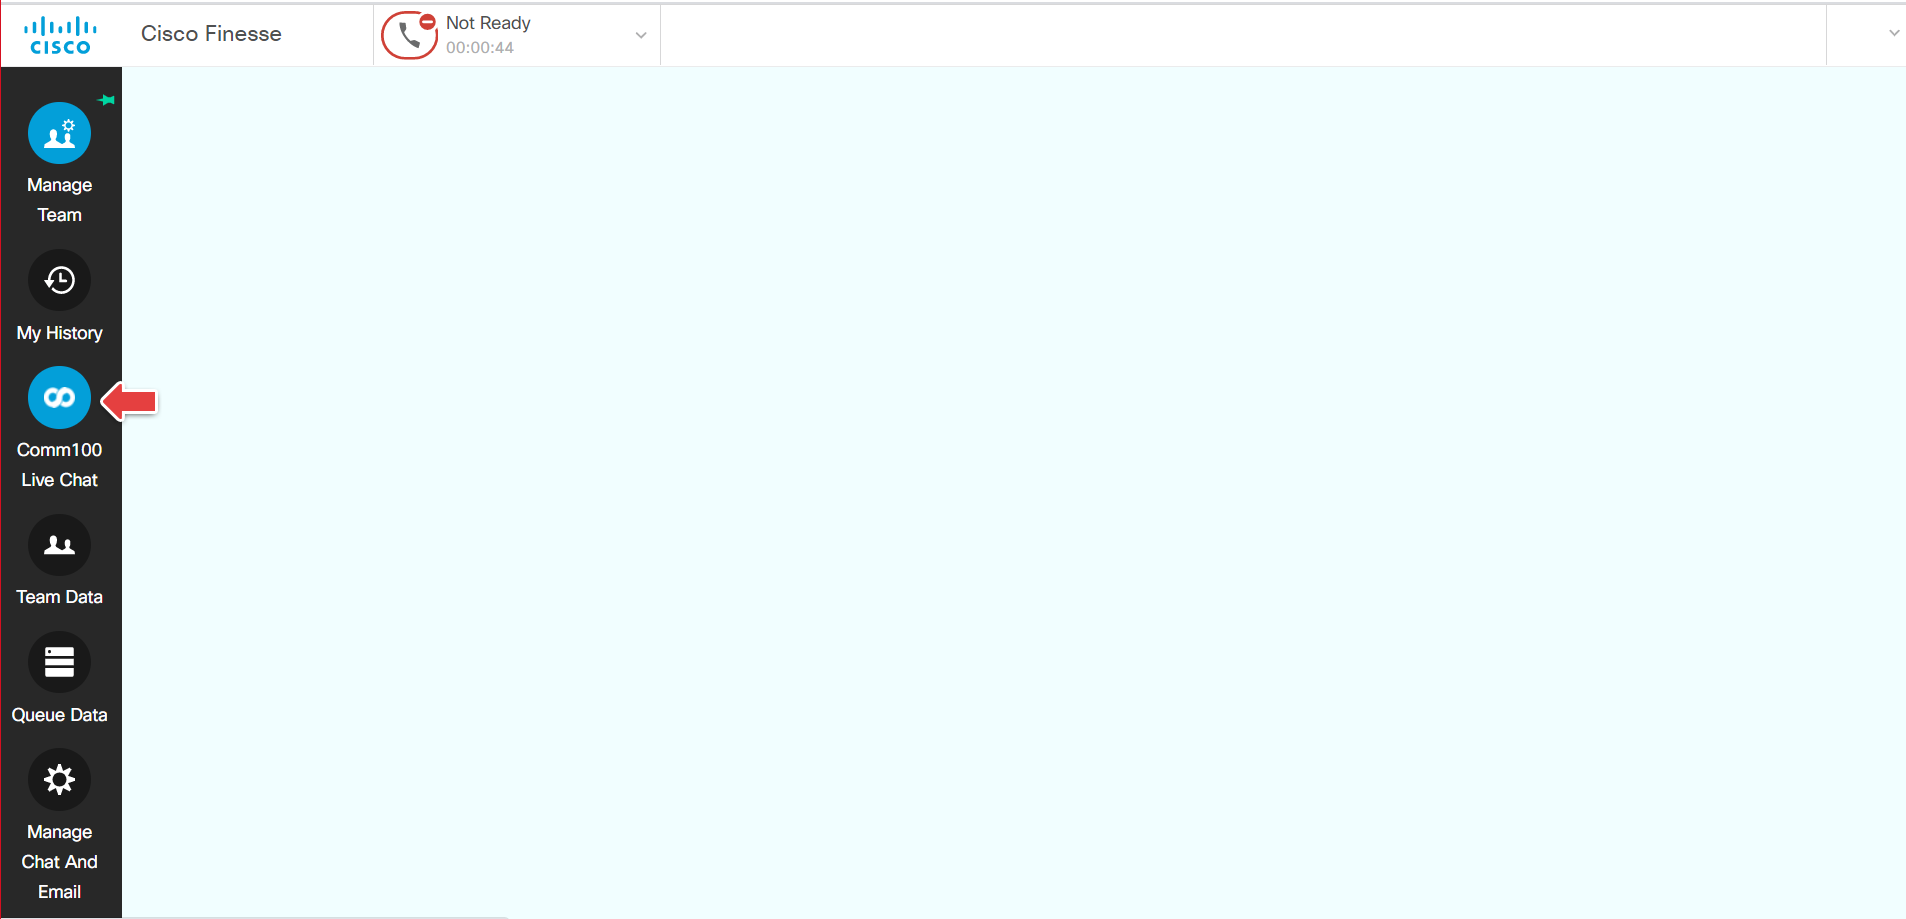
To learn more on managing third party gadgets into Cisco Finesse, see https://www.cisco.com/c/en/us/td/docs/voice_ip_comm/cust_contact/contact_center/finesse/finesse_1201/Admin/guide/cfin_b_1201-administration-guide-release-1201/cfin_b_1201-administration-guide-release-1201_chapter_01011.html. - As a mapped Cisco agent, log in to Cisco Finesse.
- On the left menu, click Comm100 Live Chat.
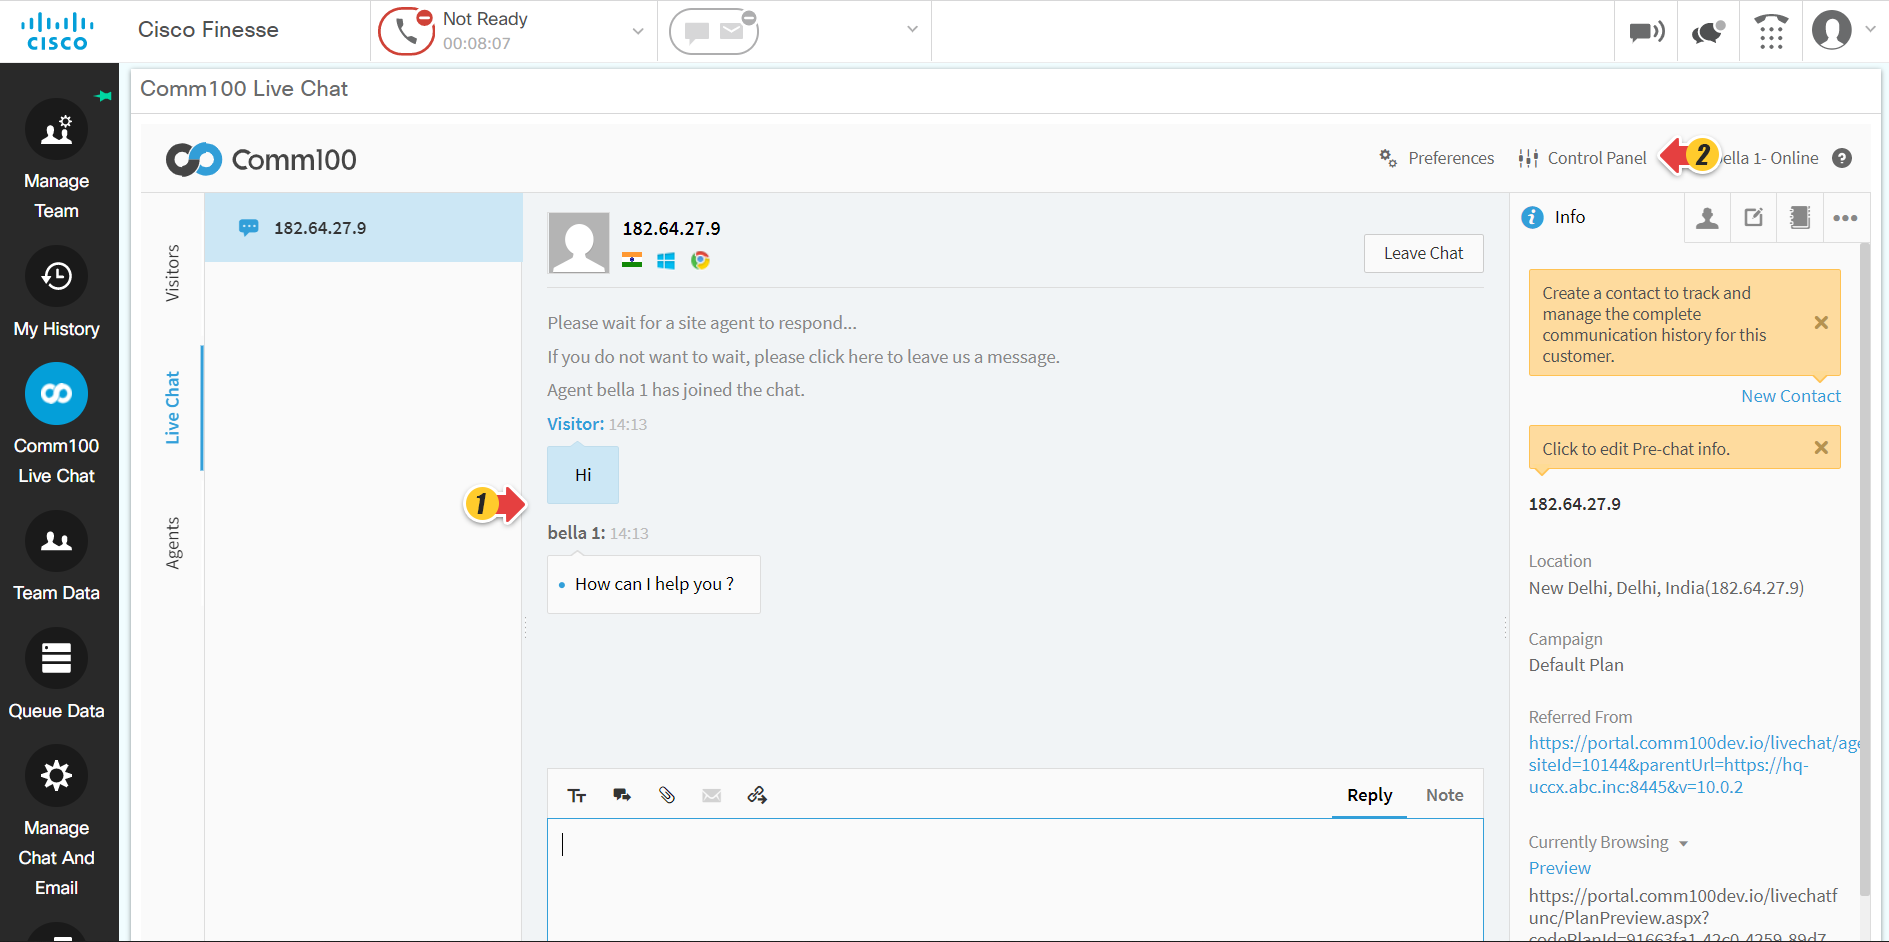
- The agent can now manage chat with a visitor in Comm100 Agent Console and can also access Control Panel directly within Cisco Finesse.
- An agent's call and chat status will be automatically switched to the predefined status when working on a chat or call.
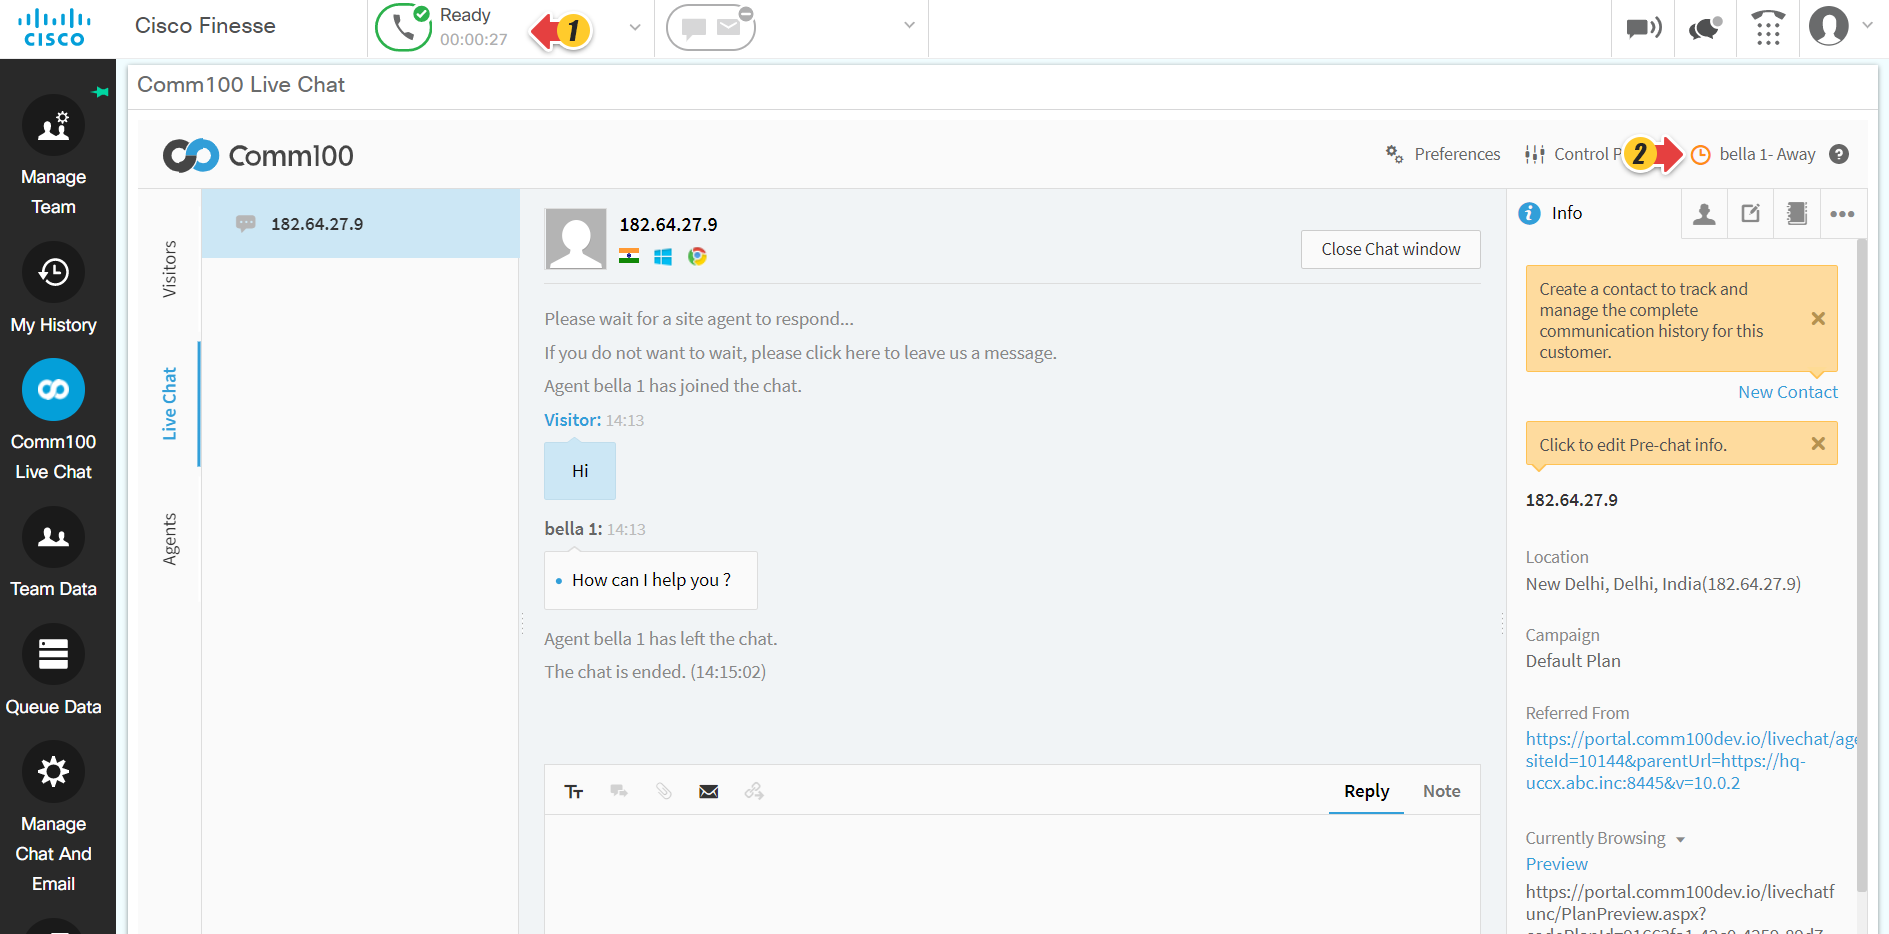
For example, when an agent is on the chat (status On Chat) with a visitor, the agent's call status is switched to the Not Ready state. During this time, the agent will not be able to receive and accept new calls until the chat with the visitor gets completed.
Similarly, when an agent is on the call (status Ready) with a visitor, the agent's chat status is switched to the Away or Meeting state. During this time, the agent will not be able to take up a new chat until the call with the visitor gets completed.
- Log in to Cisco Finesse and configure the master layout of the Finesse desktop.
Map Agents
The Comm100 administrator or agents having the valid permissions will need to map the Comm100 agent with the Cisco agent so that the mapped agent is able to access Comm100 Live Chat within the Cisco Finesse.
Note:
- A Comm100 administrator or agent needs to have the Cisco administrator Login ID and Password to map agents.
- A Comm100 agent can only be mapped to one Cisco agent. If a Cisco agent is already mapped, it could not be mapped to another agent unless the last mapping is removed.
To map the Cisco agent, please follow these steps:
- Log in to Comm100 Control Panel.
- On the Live Chat tab, from the left menu, go to Integrations & API > Cisco Unified Contact Center.
- Click Settings.
- On the Cisco UCCX/UCCE Integration page, click the Manage Agent Mapping link.
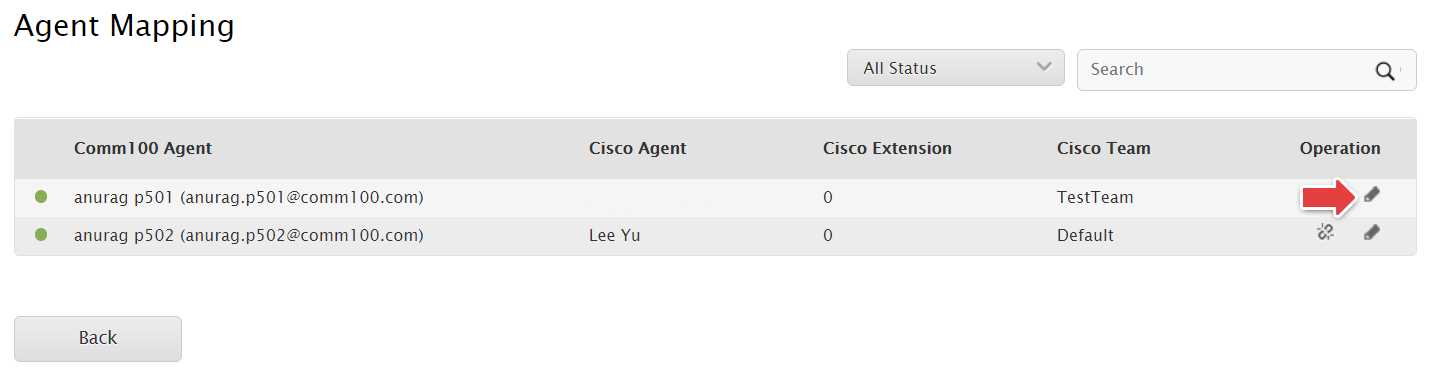
- On the Agent Mapping page, click the Pencil icon of a Comm100 agent you want to map.
- On the Edit Agent Mapping page, select a Cisco agent from the list, and click OK.
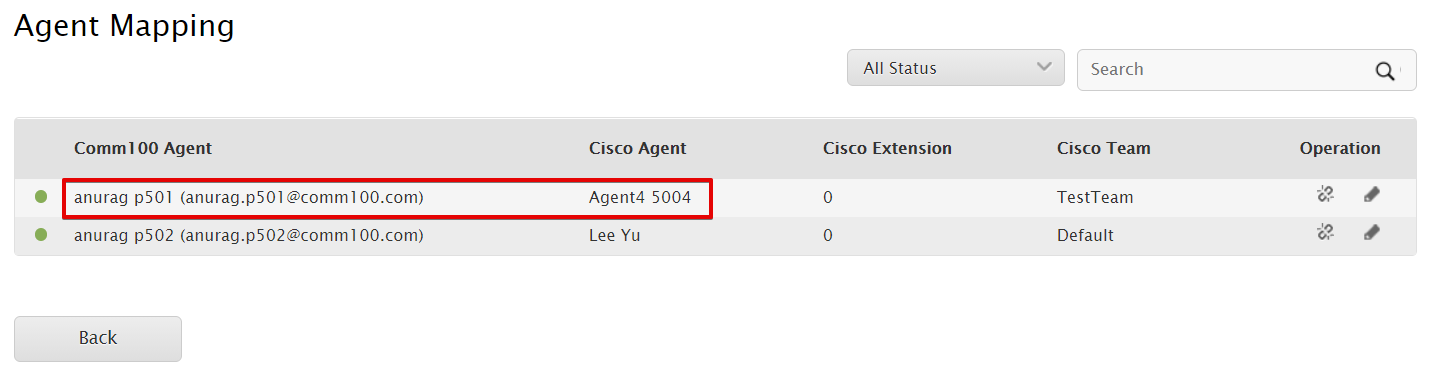
- The mapped agent now appears in the Agent Mapping list.

Unmap Agents
If required, the Cisco administrator can also unmap the agents from the Comm100 Control Panel.
To unmap the agents, please follow these steps:
- Log in to Comm100 Control Panel.
- On the Live Chat tab, from the left menu, go to Integrations & API > Cisco Unified Contact Center.
- Click Settings.
- On the Cisco UCCX/UCCE Integration page, click the Manage Agent Mapping link.
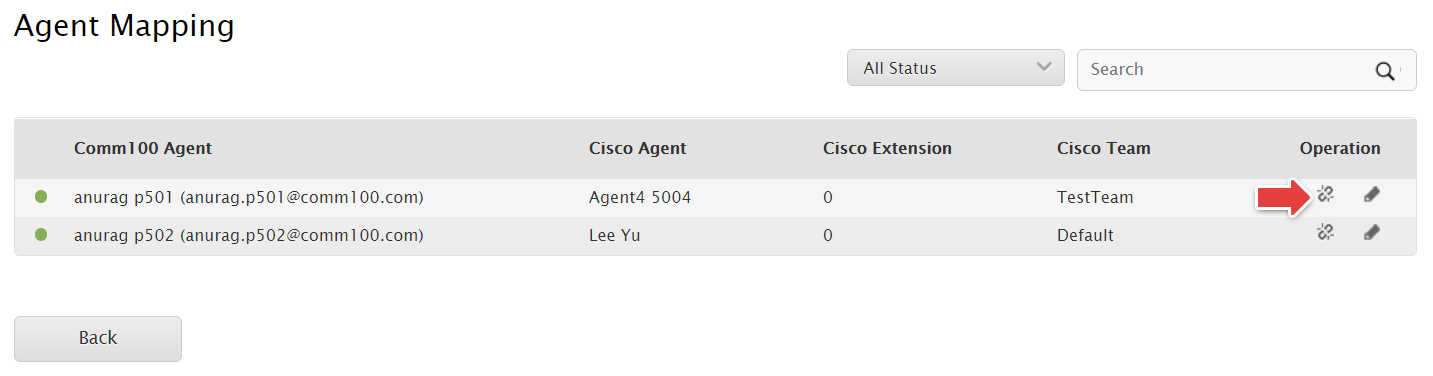
- From the Agent Mapping list, click the icon against the mapped agents you want to unmap.
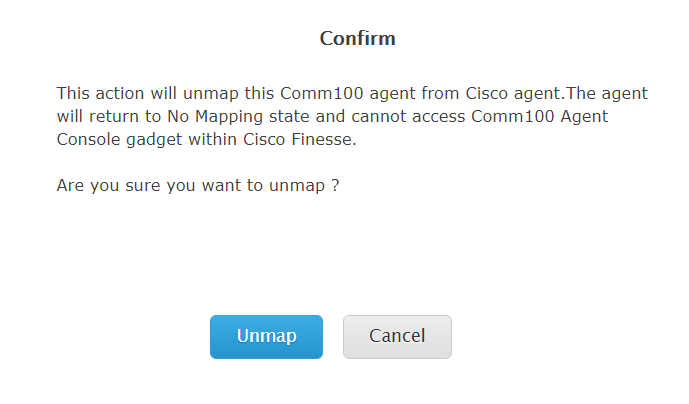
- Click Unmap to confirm the unmapping. The agent will return to a No Mapping state and will not be able to access the Comm100 Agent Console within Cisco Finesse.
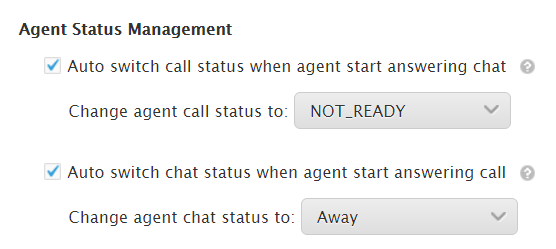
Agent Status Management
Cisco administrator can also set the auto-switching of call or chat, or both status from the Comm100’s Cisco UCCX/UCCE Integration page. Besides, the administrator can:
- Change agent call status when agent starts answering chat: The administrator can set the agent call to READY or NOT_READY status from the drop-down list. On selecting the Auto switch call status when agent start answering chat check box, the call status of an agent will be automatically switched when they start answering a chat. It will switch to the previous status automatically after the agent finishes chatting.
- Change agent chat status when agent starts answering call: The administrator can set the agent chat to Away, Meeting, or On Chat status from the drop-down list. On selecting the Auto switch chat status when agent start answering call check box, the chat status of an agent is automatically switched when they start answering a call. It will switch to the previous status automatically after the agent finishes the call.
Note: An agent can also manually change the call status to take the visitor’s call while on the chat and vice versa.
Access Restrictions and Broken Links
Only mapped agents can have access to use Comm100 Live Chat within Cisco Finesse. The agent access will be restricted in the following scenarios:
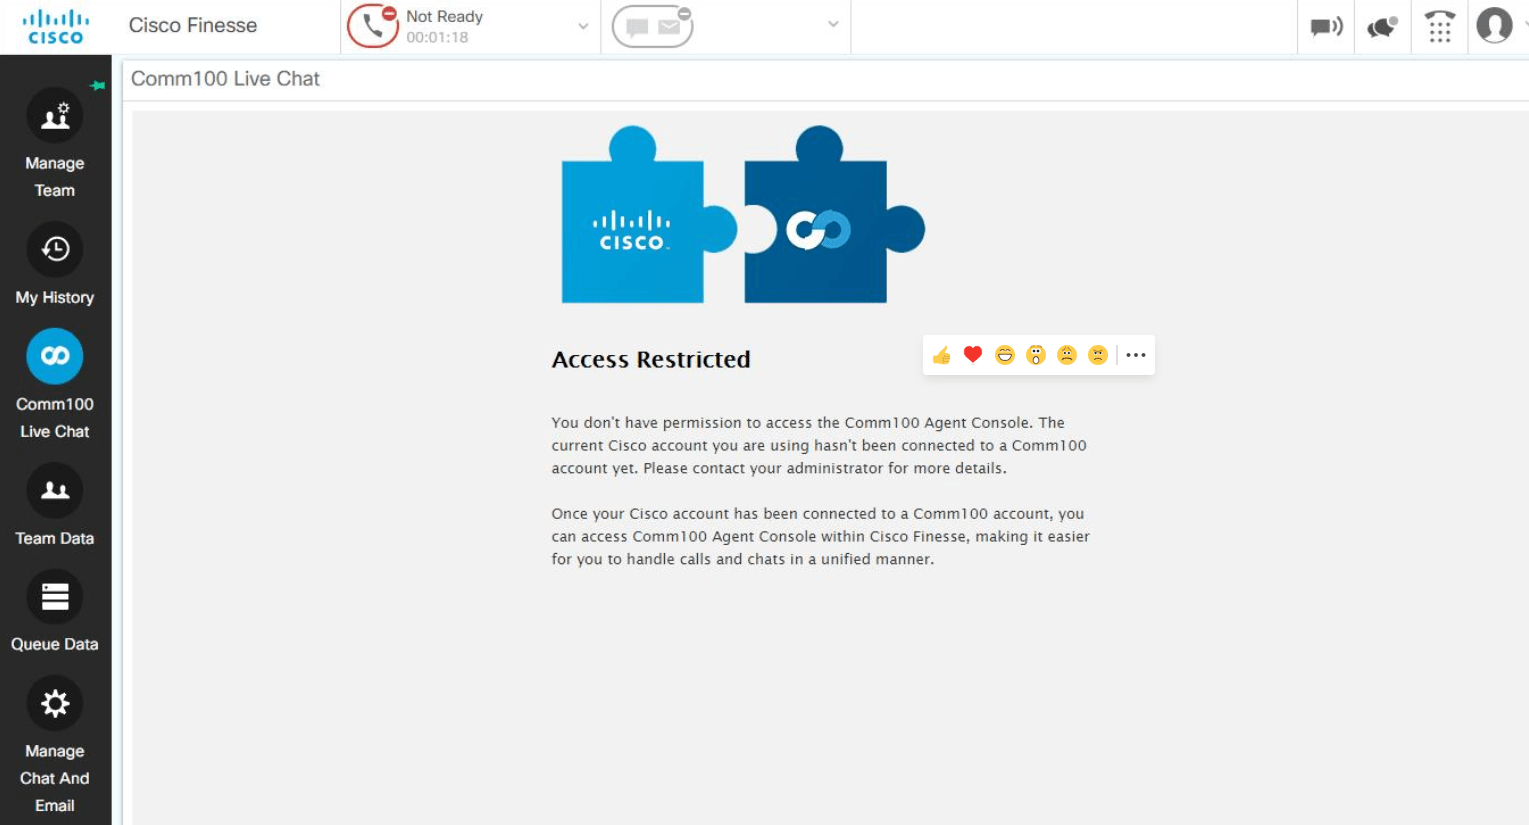
- If a Cisco agent tries to access Comm100 Agent Console within the Cisco Finesse, however, the agent is not mapped with a Comm100 agent: The agent will not be able to access Comm100 Agent Console and is notified with the Access Restricted page.
- If a mapped Cisco agent is unmapped from the Comm100’s Agent Mapping list: The agent will not be able to log in to Comm100 Agent Console and is notified with the Access Restricted page.
- If a mapped Comm100 agent is removed from the Comm100 account: The agent is removed from the Comm100’s Agent Mapping list. If a Cisco agent tries to access Comm100 Agent Console, the agent will be notified with the Access Restricted page.
- If a Cisco agent is removed from Cisco Finesse: The Cisco agent will display as (Removed) on the Comm100’s Agent Mapping list, with a broken mapping status indicated in Red.

Disconnect Comm100 with Cisco UCCX/UCCE Server
A Comm100 administrator or agent with the correct permissions can disconnect Comm100 with the Cisco UCCX//UCCE server in case the connection setting needs to be changed. For example, UCCX/UCCE server port.
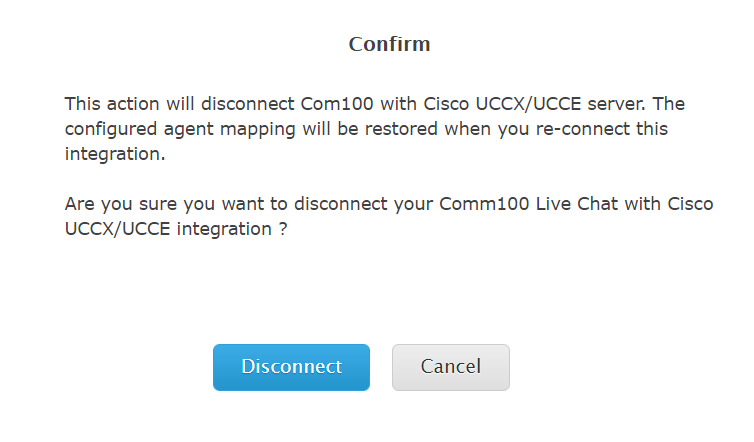
On the Cisco UCCX/UCCE Integration page, you need to click the Disconnect link beside the Connected status and again confirm the disconnection by clicking the Disconnect button.
Once Comm100 is disconnected from the Cisco UCCX//UCCE server, you can make changes to the connection settings and click Connect to reconnect to the server.
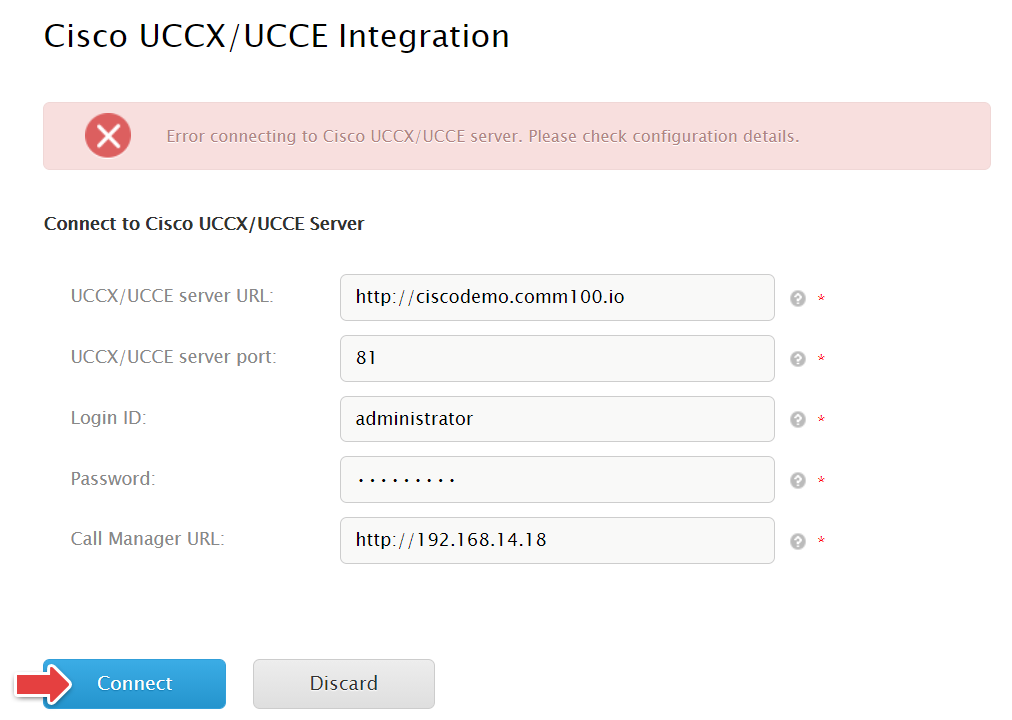
Cisco UCCX/UCCE Server Connection Error
There could be a case where the Cisco administrator may get an Error connecting to the Cisco UCCX/UCCE server. Please check configuration details message while mapping agents. This happens when the Comm100 connection with the Cisco UCCX/UCCE server is broken abruptly. To reconnect to the server, click Connect.
Note: If the Cisco Unified Contact Center App is disabled, then you will need to contact the Comm100 Sales team to get it enabled.