Agent Console settings are where you can adjust the way your chat experience works. You can set up shortcuts, notifications, configure an automated greeting, switch on the auto-translation feature, and more. There are also some admin-level features for monitoring chats in this area.
Step by Step Instructions
To configure the Agent Console settings, follow these steps:
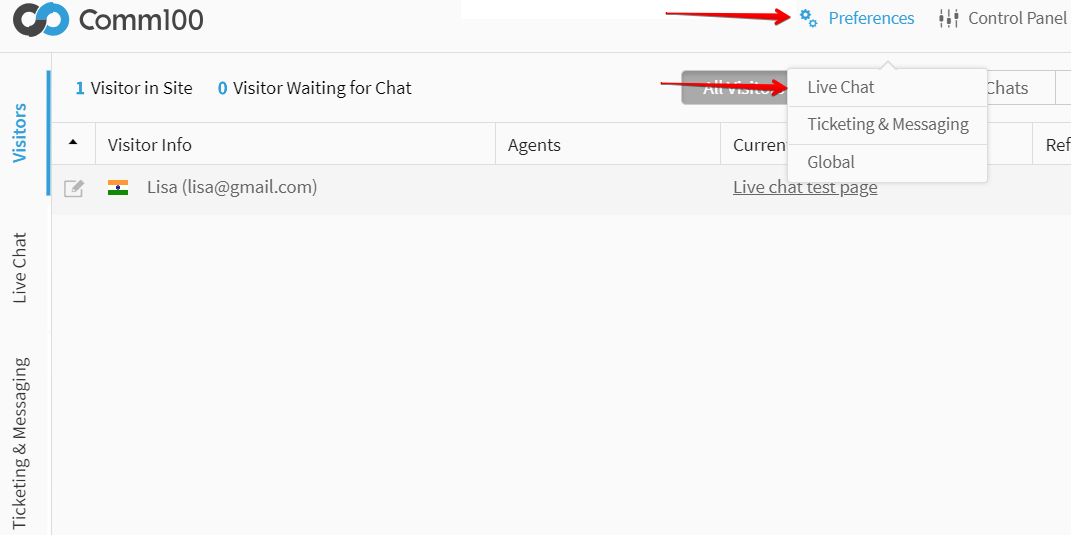
- Log in to the Agent Console.
- Hover the mouse over Preferences and then, click Live Chat.
The Live Chat settings window appears.
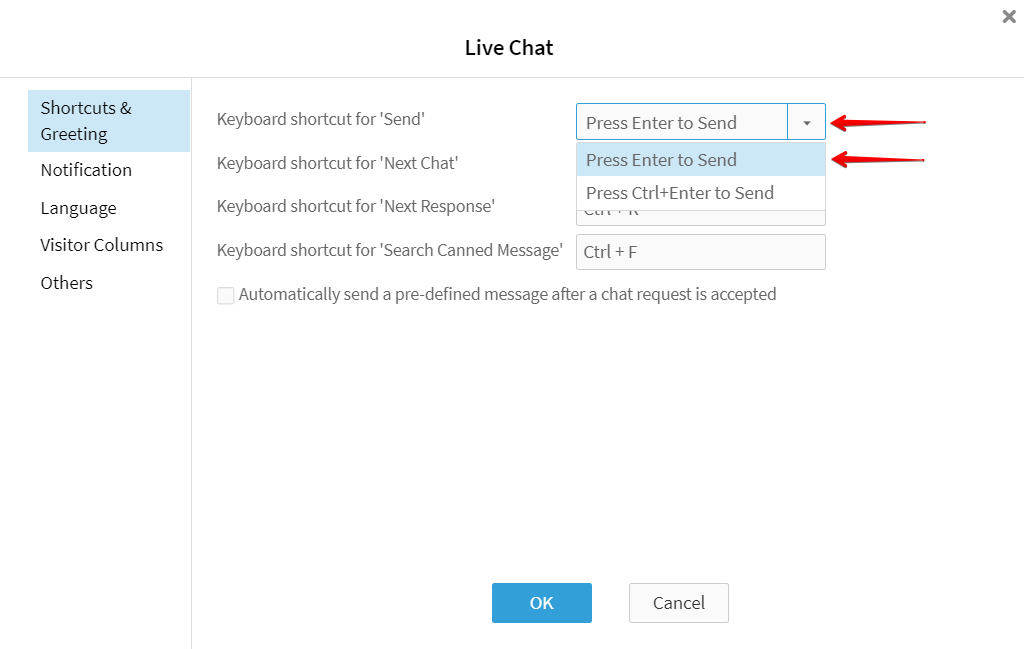
Shortcuts & Greeting
- Go to the Shortcuts & Greeting tab. Choose either Press Enter to Send or Press Ctrl (plus symbol) Enter to Send chat messages from the Keyboard shortcut for ‘Send’ drop-down menu. When one option from the drop-down is selected for sending, the other will be used for forcing a line break.
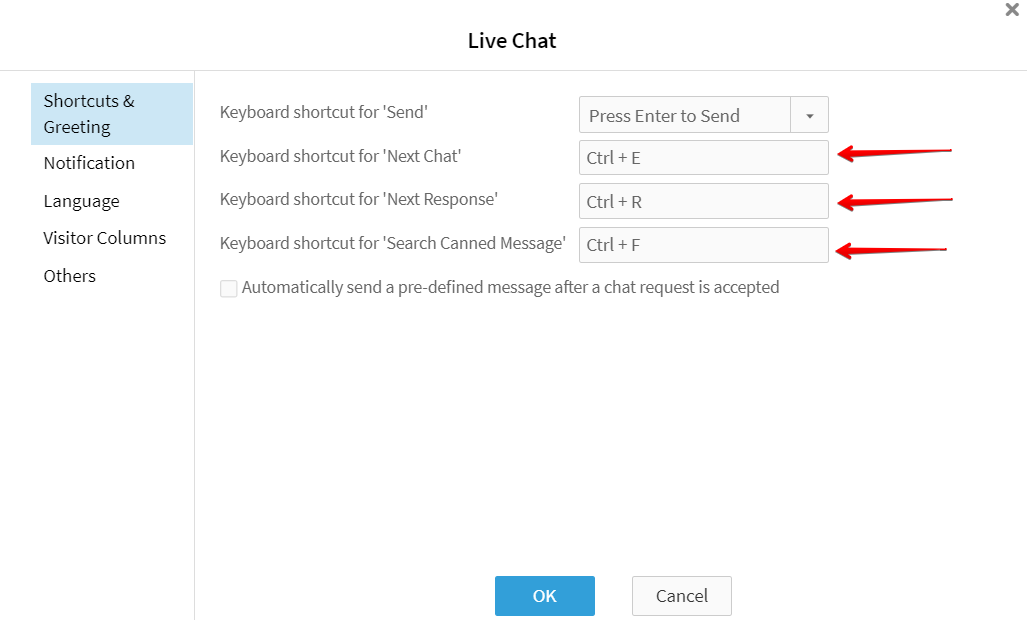
- Set Keyboard shortcut for Next Chat, Next Response, and Search Canned Message to quickly switch to another chat or response and locate a canned message.
- Select the Automatically send a pre-defined message after a chat request is accepted checkbox. The system will automatically send a greeting message to your visitor once the chat gets started. You can edit the wording and insert macros to make a more personalized greeting.
Note: The greeting our system suggests only works nicely if the pre-chat form is configured to ask the visitor’s name as a mandatory option.

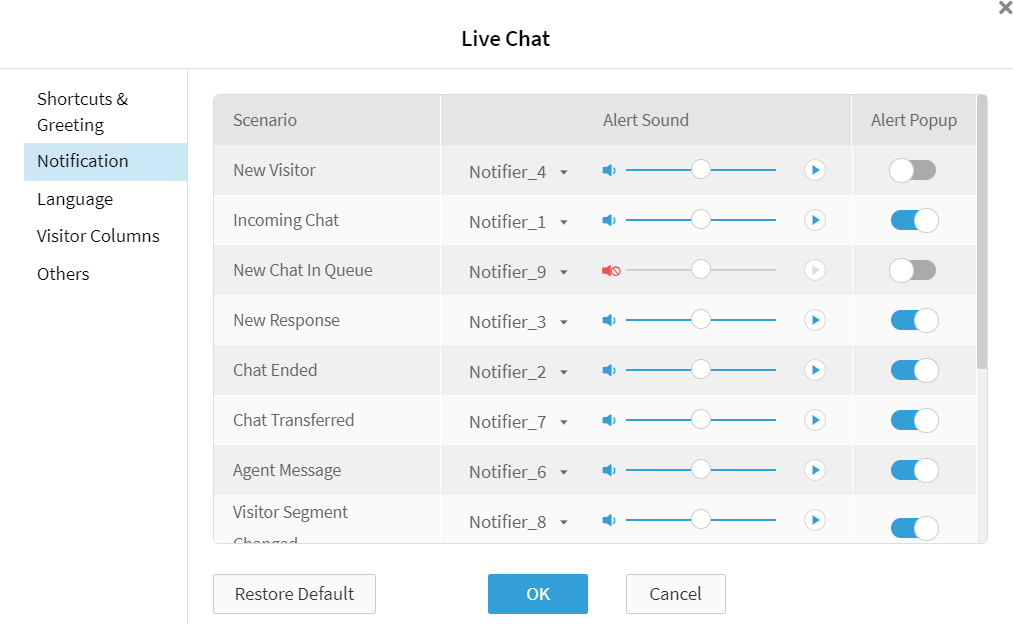
Notification
Go to the Notification tab. You can enable or disable the notification alert popup for different live chat scenarios, including New Visitor, Incoming Chat, New Chat In Queue, New Response, Chat Ended, Chat Transferred, Agent Message, and more. You can also select the notifier tone and adjust the alert volume.
Note: By default, the new visitor alert sound will be switched on, and the Agent Console will make a knocking noise every time a new visitor lands on your website. If you are looking to chat proactively with website visitors, this alert sound will be useful to you, otherwise, you can disable this alert to stop the sound from occurring.
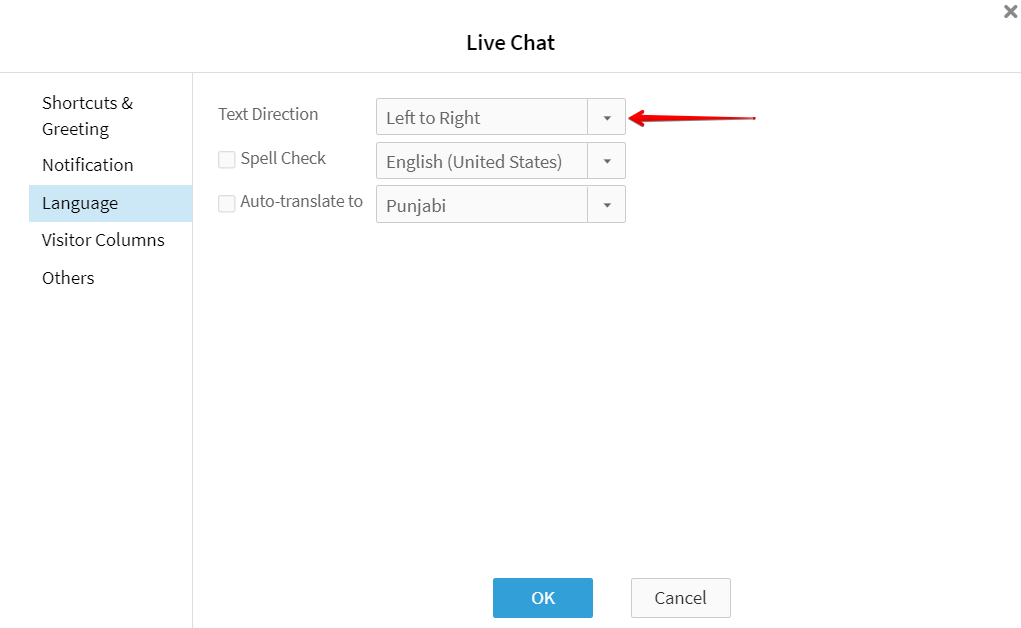
Language
- Go to the Language tab, and there you can set the direction of text showing on the agent side of the chat window.
- Select the Spell Check checkbox and choose the language you speak. Once any typo or spelling mistake is detected, a red wavy line will show under the word. You can right-click on the word and choose the correct word to use.
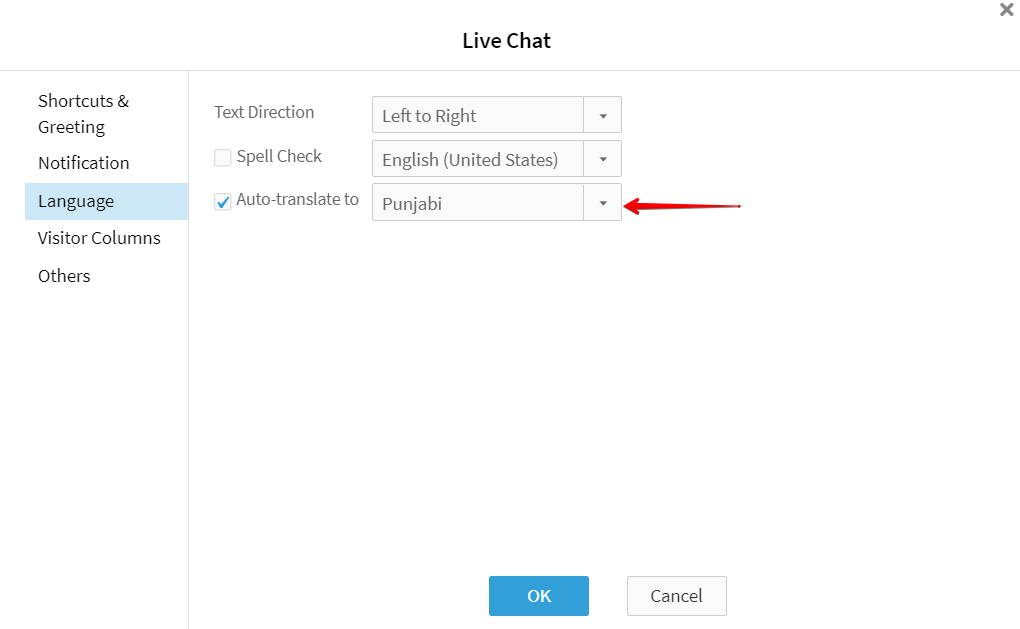
- Select the Auto-translate to checkbox and select a target language from the drop-down menu. The system will then automatically detect chat messages from a visitor who speaks a different language and translate the messages to the targeted language in real-time on both the agent and visitor side.
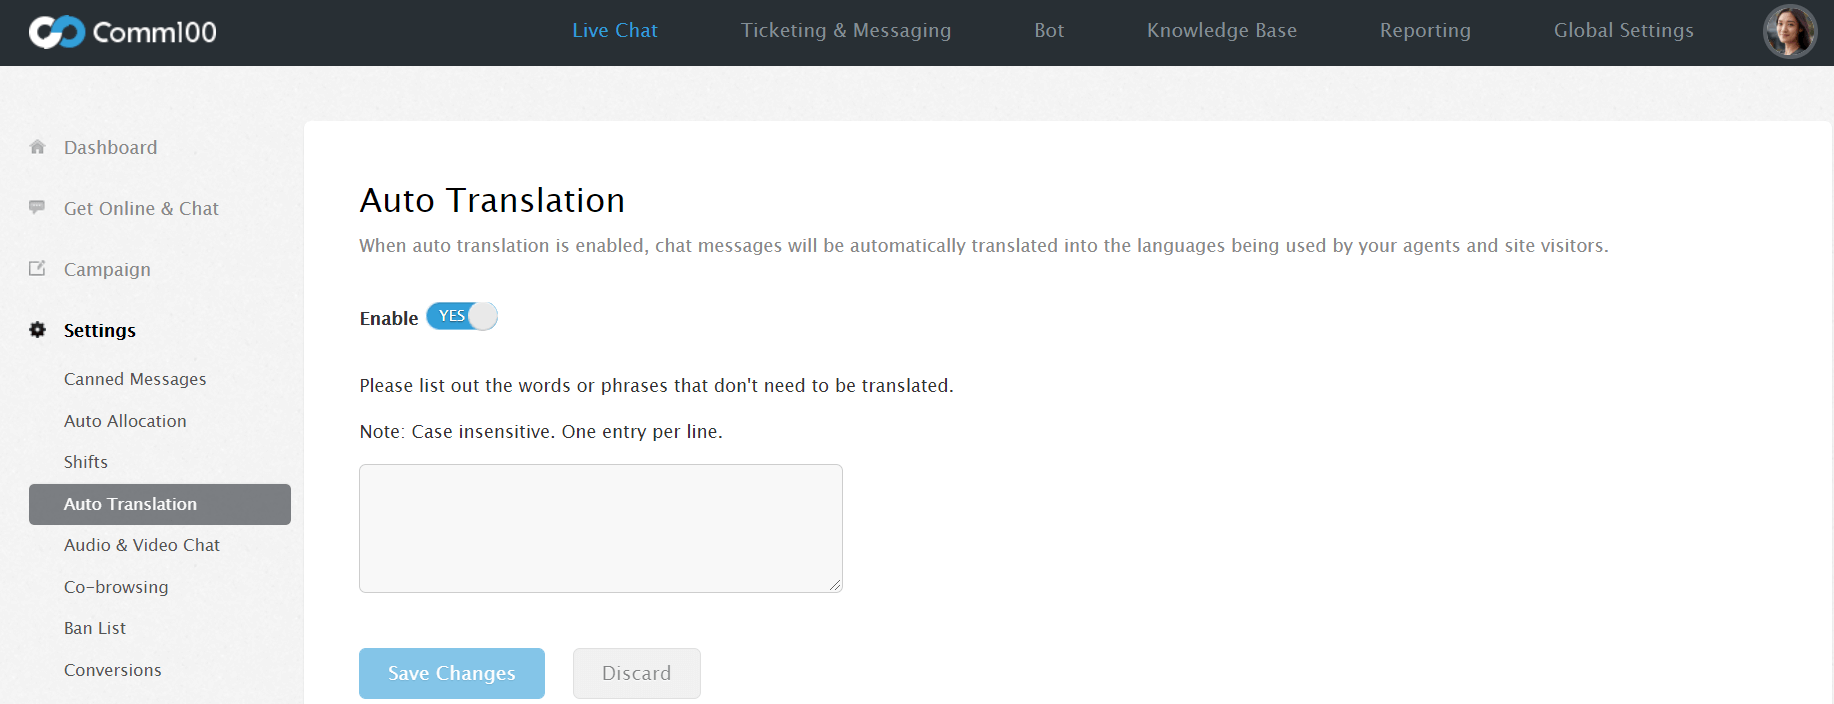
Note: To use this feature, you first need to turn on the Enable toggle key in Auto Translation from Live Chat> Settings in the Control Panel.

Visitor Columns
In the Visitor Columns tab, you can select which columns to hide or display in the Visitors tab in your Agent Console, as well as adjusting their display order.

Note: You can also adjust the column display order by dragging and dropping directly in the Visitors tab of your Agent Console.
To adjust the width of a column, please position the mouse over a column line till the cursor becomes a double arrow. Click and drag the mouse to increase or decrease the width.
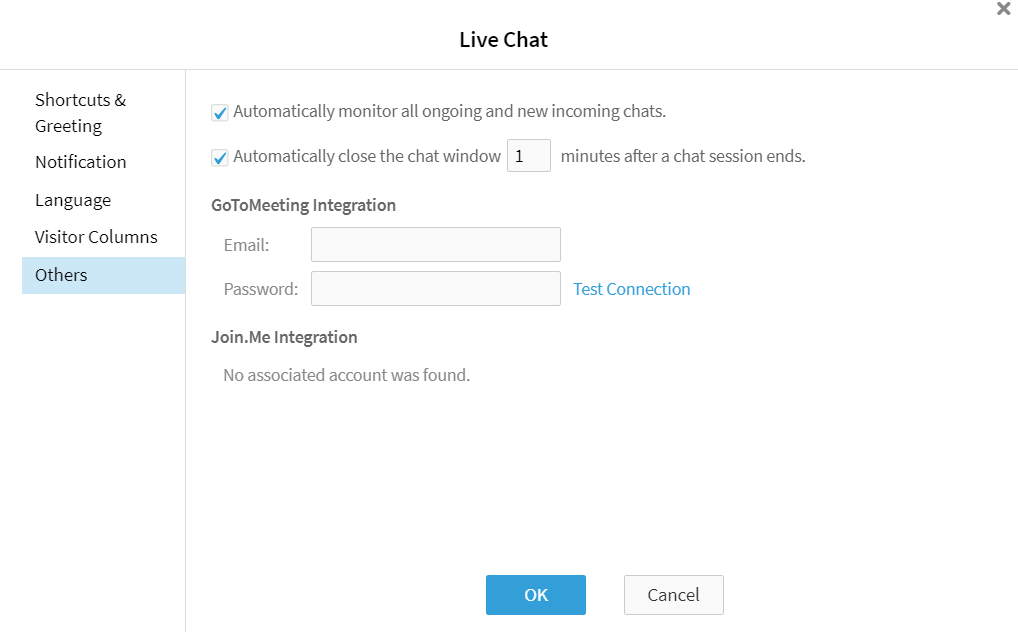
Others
In the Others tab, you can set your preference for Automatically monitor all ongoing and new incoming chats and Automatically close the chat window.
In the Global tab, you can set your preference for Automatically login with last login information, Start Agent Console upon startup of your machine, Auto Logout, and Auto away.
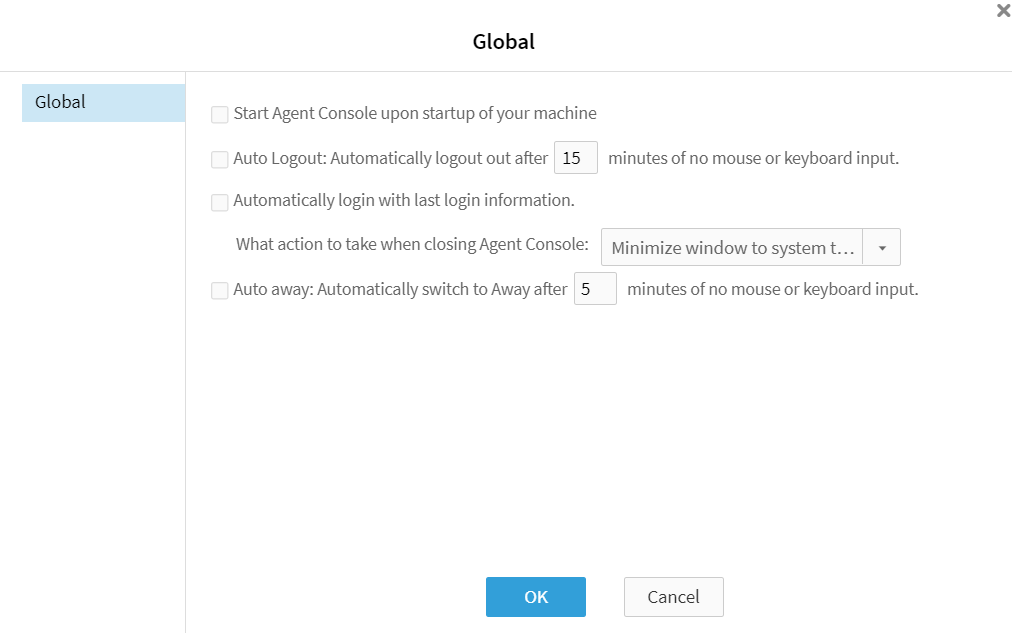
- Select the Automatically login with last login information checkbox if you want to save time entering email and password every time. Once you open the Agent Console, you’ll be automatically logged in.
- Select the Auto away checkbox (only available in the Desktop app) and specify the time period if you want the system to automatically change your status to Away when no mouse or keyboard input is detected.
- Select the Auto Logout (only available in the Desktop app) checkbox and specify the time period if you want the system to automatically log you out from the Agent Console when no mouse or keyboard input is detected.
- Choose whether you want to exit or minimize your Agent Console to the system tray when you cross out the Agent Console (only available in the Desktop app).